 Blogs
Blogs
Create a server-side app in Swift
Some months ago, I noticed that most iOS developers here at Wolox needed to make regular changes to a ruby-based API, but only a few of them knew how to code in that language. Consequently, making changes to this API always took a considerable amount of effort. Then I thought: wouldn’t it be great if we could build a backend in a language we all knew? That would save us a lot of time and effort!
And then I found Vapor.
In this tutorial we will learn how to set up a basic project with Vapor 3, the most frequently used web framework for Swift. After building the app, we will connect it to a database and, lastly, we will host it on a Heroku server.
So, first of all, we will install the necessary tools to develop this project.
1. Install Xcode
We will need Xcode, so let’s download it from here. Xcode also includes a version of Swift.
2. Install Homebrew
Homebrew is the most complete package manager for macOS. It downloads and installs all the dependencies you will need during this tutorial.
/usr/bin/ruby -e "$(curl -fsSL https://raw.githubusercontent.com/Homebrew/install/master/install)"
3. Install Vapor Toolbox
This is a very useful CLI (command line interface) that will help us to create and deploy the app.
brew tap vapor/homebrew-tap
brew update
brew install vapor
4. Create your first Vapor project
Yay! We’re ready to start. We will create an app called woloxusers. To create the project, just run this command:
vapor new woloxusers
5. Fetch dependencies
We now need to fetch the dependencies and generate Xcode project files. To do so, execute the following commands:
cd woloxusers/
vapor update -y
This may take a moment to finish but afterwards you’ll have a template project that is ready to run.
6. Delete unnecessary code
Your project structure should now look like this:
woloxusers/
├── Package.swift
├── Sources/
│   ├── App/
│   │   ├── Controllers/
│   │   │   └── TodoController.swift
│   │   ├── Models/
│   │   │   └── Todo.swift
│   │   ├── app.swift
│   │   ├── boot.swift
│   │   ├── configure.swift
│   │   └── routes.swift
│   └── Run/
│       └── main.swift
├── Tests/
├── Public/
├── Dependencies/
└── Products/
Let’s delete the classes we don’t need (TodoController and Todo)
woloxusers/
├── Package.swift
├── Sources/
│   ├── App/
│   │   ├── Controllers/
│   │   │   └── TodoController.swift
│   │   ├── Models/
│   │   │   └── Todo.swift
│   │   ├── app.swift
│   │   ├── boot.swift
│   │   ├── configure.swift
│   │   └── routes.swift
│   └── Run/
│       └── main.swift
├── Tests/
├── Public/
├── Dependencies/
└── Products/
7. Create a User model and include it inside the Models directory.https://medium.com/media/cbed31d68367d4379011fbf0ddcb9317
8. Create a UserController and include it inside the Controllers directory.https://medium.com/media/536f5078d33d3c15e0e6ce7eb5e602d6
9. Now let’s replace the content of configure.swift:https://medium.com/media/5d846dc64ddaeeadb7296483dd7c97c7
10. Replace the content of routes.swift as well:https://medium.com/media/cb0655a7b6bcb965a5b2c2be59917b27
We’re ready to start the app. After you have done that, send some POST requests to save a couple of users:
curl -H "Content-Type: application/json" \
-X POST \
-d '{"username": "Leonardo"}' \
http://localhost:8080/userscurl -H "Content-Type: application/json" \
-X POST \
-d '{"username": "Michelangelo"}' \
http://localhost:8080/users
Now you can send a GET request to take a peek on the user collection!
curl http://localhost:8080/users
Looking good!
But wait, can we update the first user? Of course, we can:
curl -H "Content-Type: application/json" \
-X PATCH \
-d '{"username": "Raphael"}' \
http://localhost:8080/users/1
Finally, let’s delete the first user:
curl -H "Content-Type: application/json" \
-X DELETE \
http://localhost:8080/users/1
Cool, isn’t it?
The only issue is that this data will be lost after we have stopped the application. This occurs since SQLite is an in-memory database that lives as long as we keep our app running.
Connect your app to a PostgreSQL database
In order to persist our data, we need to use a database that saves everything on disk storage, as most databases do. We have chosen PostgreSQL for this purpose.
Let’s first install PostgreSQL using Homebrew:
brew install postgres
brew services start postgresql
Now we need to create a user and a database. The user will be called “postgres” and the DB will be named “woloxusers”.
createuser postgres -s
createdb woloxusers -O postgres
If you previously had an older version of Postgres installed, an error might appear when you run createuser. If that happens, go to the Troubleshooting section at the end of the post.
Yay! We have a DB instance running. The only thing left is to connect the database to the app, so let’s change package.swift to do that:https://medium.com/media/68922133a710e3dd8bde191b94ac2fad
We have added new dependencies, hence, we will need to fetch them. Let’s run update command again:
vapor update -y
Now we should update configure.swift as well:https://medium.com/media/98a09a79be790d07b03b511968c620aa
We’ll also have to update our User model to use Postgres instead of SQLite:https://medium.com/media/b92a5b013e0add2cfd8ae4a0c7acfaf2
Okay! We’re good to go. Now the app will save and retain all the data we send to it. Give it a try!
Host your app on Heroku
As a final step, let’s upload our app to the cloud. We will use Heroku since it’s free and easy to use. To begin with, go to Heroku site and sign up. You may skip this step if you already have a user.
Next, install Heroku CLI and log in with the same credentials you used on the site:
brew tap heroku/brew && brew install heroku
heroku login
Now go to the project directory and link your app to a Heroku instance:
heroku create projectname
heroku buildpacks:set vapor/vapor
We have also set a buildpack to the Heroku instance. This provides Heroku with the necessary instructions to start and deploy the app.
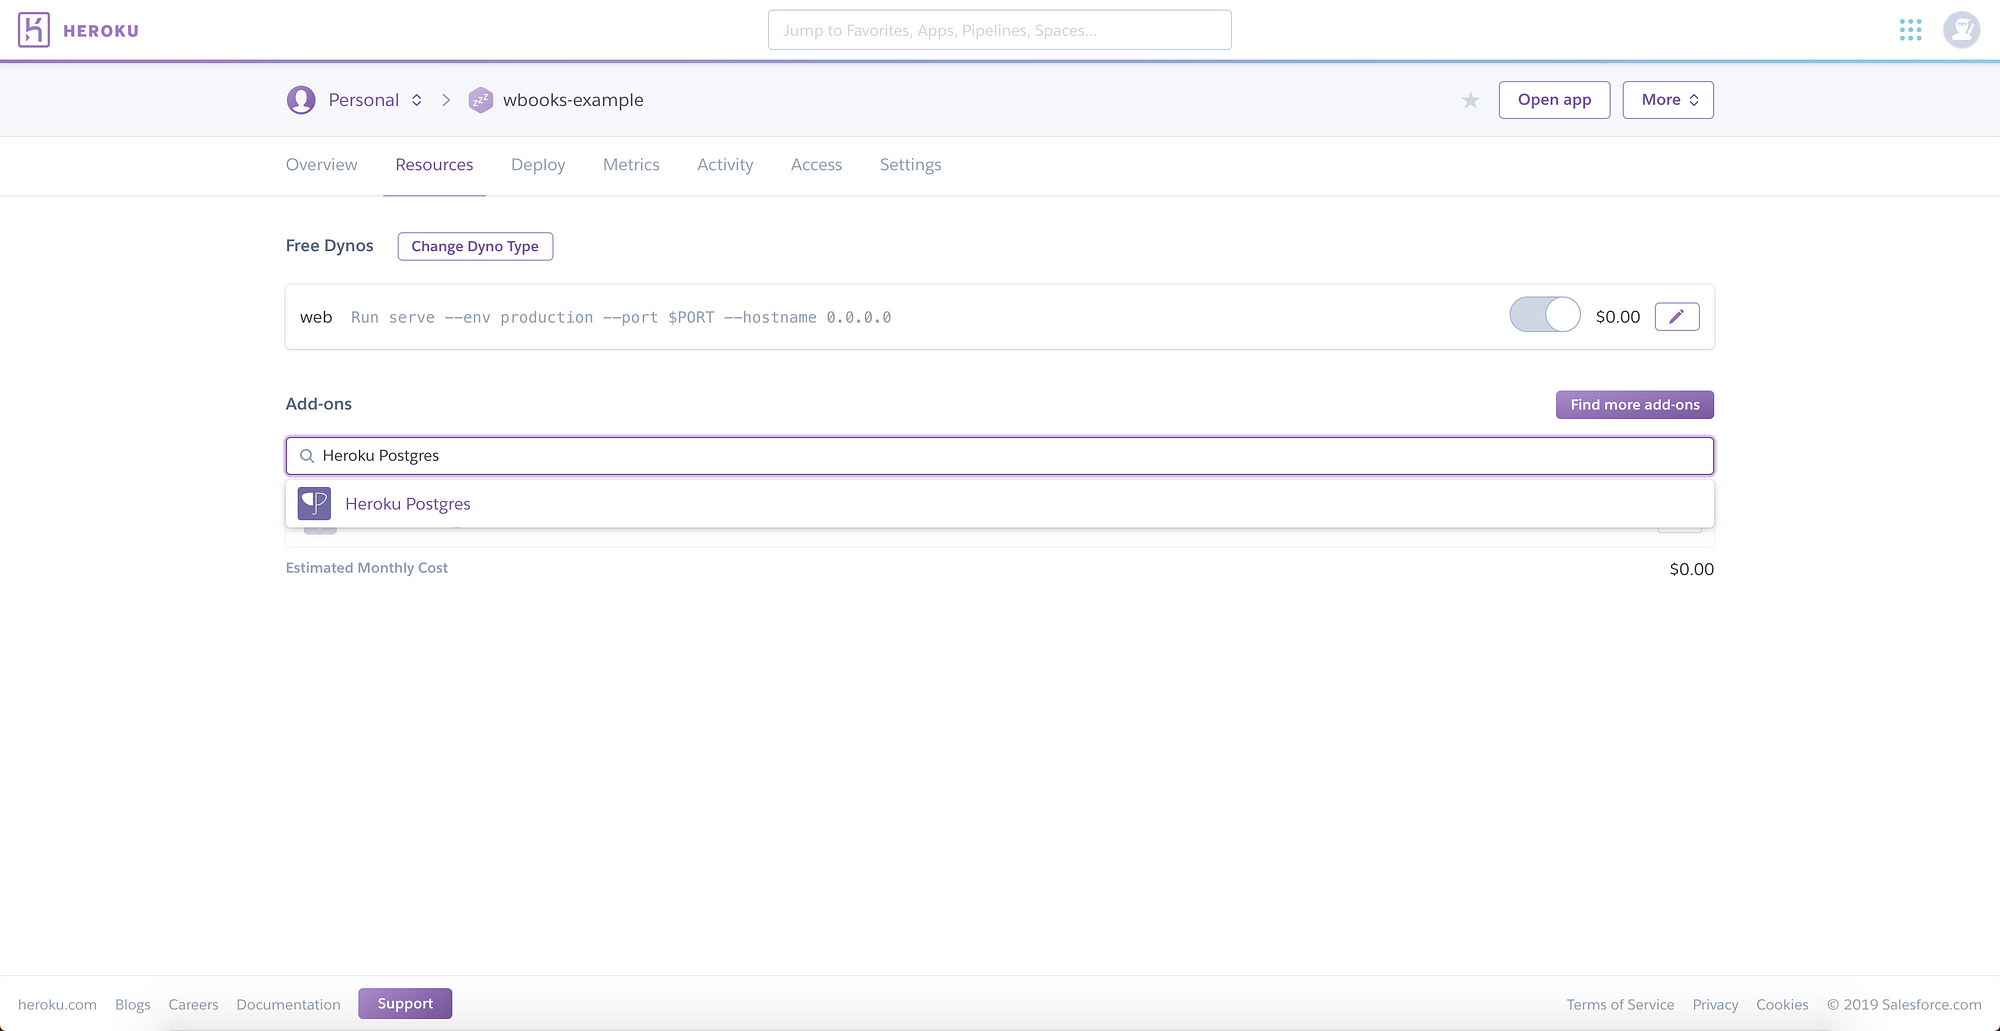
Next, go to Heroku site, sign in and enter your application dashboard. Click on “Resources” tab and write “Heroku Postgres” in the textbox to include it as an add-on.
You will have to modify configure.swift to use the new Postgres credentials:https://medium.com/media/8985e49ae820d4bba2270ee8bd53bac6
Here, "DATABASE_URL" refers to an environment variable that is available by default on every Heroku instance. As the name implies, the variable holds the URL to connect to the database. Its content may change from time to time, so it’s a good idea to always point to the environment variable instead of using its content directly in your app.
Next, let’s add a new file in the root directory of your project. We will name it Procfile and it will contain the instructions to start the app. This is its content:
web: Run serve --env production --port $PORT --hostname 0.0.0.0
We’re ready to push our app to Heroku. To do so, first commit your changes:
git add .
git commit -m "Wolox-users app"
and then run the following command:
vapor heroku push
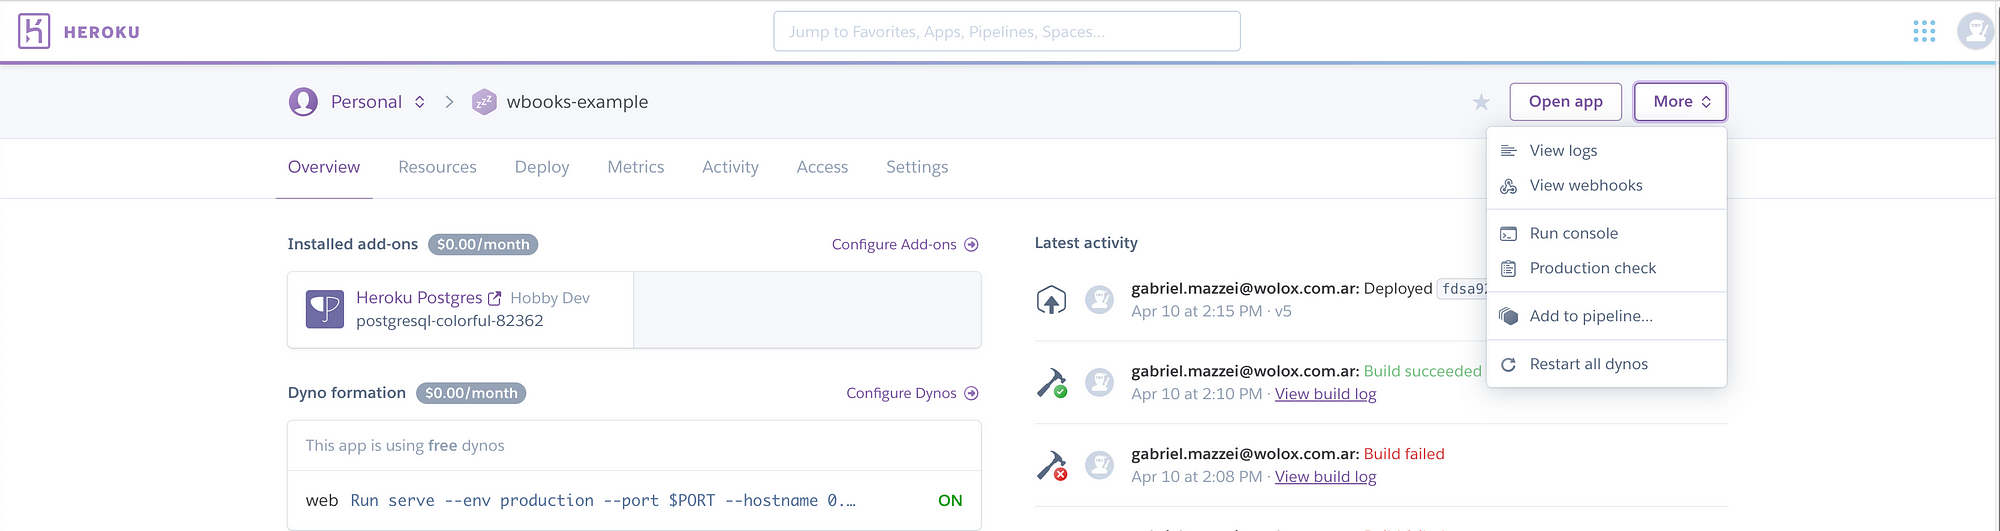
It may take a while to finish, but while you wait, you can check out the logs in your Heroku Dashboard → Overview → More → View logs.
Done! You can now send requests to your app. Just try the following curl (it should return an empty user list):
curl https://projectname.herokuapp.com/users
If you want to execute another kind of request, we’ll leave you some examples:
- POST:
curl -H "Content-Type: application/json" \
-X POST \
-d '{"username": "Leonardo"}' \
https://projectname.herokuapp.com/users
- PATCH
curl -H "Content-Type: application/json" \
-X PATCH \
-d '{"username": "Raphael"}' \
https://projectname.herokuapp.com/users/1
- DELETE:
curl -H "Content-Type: application/json" \
-X DELETE \
https://projectname.herokuapp.com/users/1
And that’s all. Pretty simple, isn’t it?
We have built an app from scratch, connected it to a database and uploaded it to a Heroku server. Using Vapor, every iOS developer can create their own backend very quickly and with little to no effort.
If you have any feedback or comments, just let me know! I’d really appreciate it! 😉
Troubleshooting
If Postgres throws an error similar to “could not connect to server”, you may have to uninstall the old version of Postgres and delete some remaining folders before installing the new version. To do that, execute the following commands:
# Uninstall postgres
brew uninstall postgresql
brew doctor
brew cleanup# Remove remaining folders
rm -r /usr/local/var/postgres
rm -r /Users/<username>/Library/Application\ Support/Postgres# Install the last version
brew install postgresql# Start the process
brew services start postgresql
Source: Medium


