 Blogs
Blogs
How to deploy your Node.js app with Google
Getting started with Google Cloud Platform & App Engine

Google Cloud is increasingly in demand as deployment platform for developers, however, the obscurity of their documentation and sheer abundance of options can make the process quite challenging. In this post, I will walk you through the steps of setting up a project on Google Cloud and deploying a Node.js app via App Engine. These instructions are tailored for full stack apps that use React or Vue on the front-end and any Node.js server framework, but many of the principles will apply across languages and frameworks.
If you’re totally new to Google Cloud Platform (GCP), you can get started for free and, as of July 2020, take advantage of $300 in free credits for 12 months. Sign up with your Gmail account. You will need to use a credit or debit card to sign up, but Google won’t automatically charge it after 12 months.
Create a Project
Once you are logged in to Google Cloud, head over to the “Console.” Here is the main dashboard for all the services offered by GCP. Toward the left side of the nav bar, there will be an option to start a new project (or select a project, if you already have any existing projects with GCP). You may already have GCP projects without realizing it if you’ve used any Google APIs, like the YouTube API. In the “Select a project” view, click “NEW PROJECT” on the top right. From here, you can name your project and click “CREATE.” When you return to the GCP dashboard, make sure your new project is selected from that drop-down in the nav bar before proceeding.
Create Application in App Engine
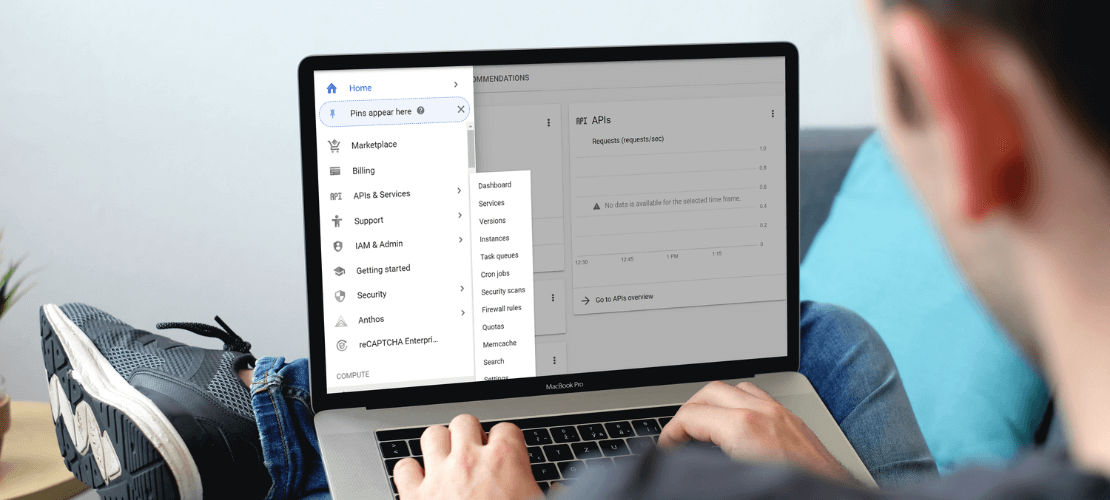
Next, navigate to App Engine via the left sidebar:
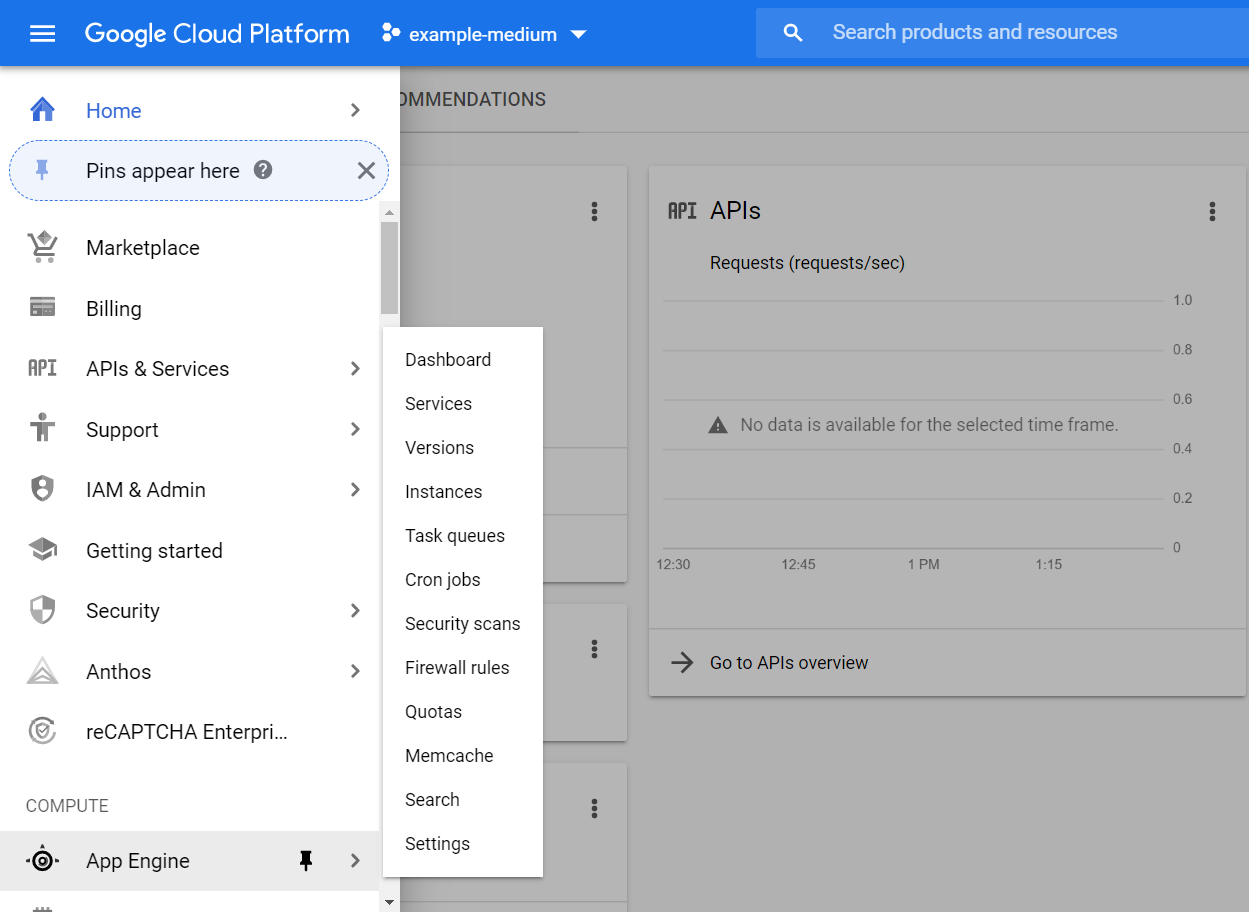
From here, click on “App Engine” — go to the main page for this section. Here, you will be prompted to create an application. Click this button, choose a region nearest to you or your users and select “Create App.” Here you can select your language and type of environment. For this example, I will be deploying an app in Node.js.

Whether or not you choose a standard or flexible environment will depend on your app’s needs. Generally, if you are just deploying via App Engine and not using the Compute Engine (virtual machines) or a Docker container, you will be fine with the standard environment. The good news is that you can change this later if you run into issues or your app changes. Read more about App Engine’s environments. Click “Next” to create your App Engine app.
Using the Cloud Shell or the Cloud SDK
After you create your app, you will be given instructions to download the Cloud SDK. This will set you up to access your GCP project and app via your terminal on your computer. Alternatively, you can use the Cloud Shell provided in the browser. Both use the same commands to deploy your app. I won’t go into the instructions for installing Cloud SDK, but you can find the quick start documentation for it here.
Open up Cloud Shell by clicking the terminal icon >_ on the right side of the nav bar. This is your terminal access to your GCP account. Make sure your current project is set to the project you want to deploy in — there should be bold, yellow text with your project name after your GCP name userxyz@cloudshell in the terminal. If this is not the correct project or you don’t see a project name here, use the following command to change it (replacing example-medium with your project’s name):
gcloud config set project example-medium
In addition to some GCP specific commands, you can use common bash commands in the Cloud Shell. Your home directory here is exactly like your home directory in Ubuntu or any other machine you access through the terminal.
Deploying your app
Now that you have successfully set up your GCP account and created your App Engine application, you can start the deployment process. For these instructions, you will need an app that has a repository stored on GitHub.
- Clone your repository into your home directory:
git clone https://github.com/username/reponame.git - Change into your repo directory:
cd reponame - Install the dependencies:
npm install - Set environmental variables with an app.yaml file:
touch app.yaml - Run build (if needed):
npm run <build script name> - Make sure your package.json has a working start script
- Preview your app
- Deploy:
gcloud app deploy
Set Environmental Variables
When you deploy on Google, the App Engine will look to set your environmental variables through an app.yaml file rather than the standard .env file. This file will also tell App Engine other information about your app’s environment. The syntax for this file is a little different than a .env:https://levelup.gitconnected.com/media/d5b016175697396e43a49d8df5797dfd
The bare minimum that you will need in your app.yaml to deploy on App Engine is to set your runtime to whatever version of your environment’s language. Here, I have it set to Node.js version 10. If you don’t have any other environmental variables in your app, you will be good to go.
If you are following along in Cloud Shell, you can actually open up the cloud editor to edit this file. Click “Open Editor” in the top right area of the shell window. Make sure you are in the correct directory. You can either create the app.yaml in your terminal using the touch command or create it through this GUI.
Learn more about the app.yaml and GCP here.
Run the Build
For apps built in React, Vue, TypeScript, and others that require parts or all of the code to be compiled and minified, you will need to manually run the build in the shell before you can deploy. Oftentimes this will be a script like npm run build:client. Check your package.json if you are unsure.
Note: some builds may fail if your environmental variables are undefined. This can happen because App Engine won’t start looking for your app.yaml until you deploy. If your build fails and any of your environmental variables are implicated, you may need to copy over your .env file from your development environment and then re-run the build.
Set Start Script
While you’re in your package.json, make sure you have a working start script to start the server. App Engine will by default use npm run start to start your app’s server when it deploys, so if you have customized your environment in another way, you will just need to make sure this script will start your server.
Preview Your App
You can manually run your start script in the shell and preview your app through the “Web Preview” icon on the top right of the shell window. Note that if your app uses Google’s Cloud SQL for a remote database, it may not work in preview unless you connect to the database through a proxy. I have found it easier to just deploy the app to see if it is successfully connecting to a Cloud SQL instance through the logs or as a result of my app working how I intend.
Deploy Your App
Once you have installed dependencies, set up your app.yaml and start script, and run your build, you can deploy! gcloud app deploy in the shell and select y to proceed. The deployment can take up to a few minutes.
Check the Logs
If you need to debug or see what’s going on in your deployed server’s console, you can check the logs. After deploying, you will see a command to check the logs in the shell: gcloud app logs tail. You can also find them through the App Engine > Versions section in GCP’s Console.
Conclusion
There is a bit of a learning curve and documentation overload using Google Cloud Platform. In this article I hope to demystify the processes of deploying a Node.js application via App Engine. Once you are set up, it is as easy as pulling from your app’s origin master, checking for any new dependencies, re-running your build, and then you can easily re-deploy over and over as needed throughout development.
Source: Level Up Coding


