 Blogs
Blogs
Sign In with Apple using Swift

Sign In with Apple allows users to set up an account and sign in to your apps and websites with their Apple ID.
Enabling Sign In with Apple ID
There are two ways using which you can enable Sign In with Apple ID Capability.
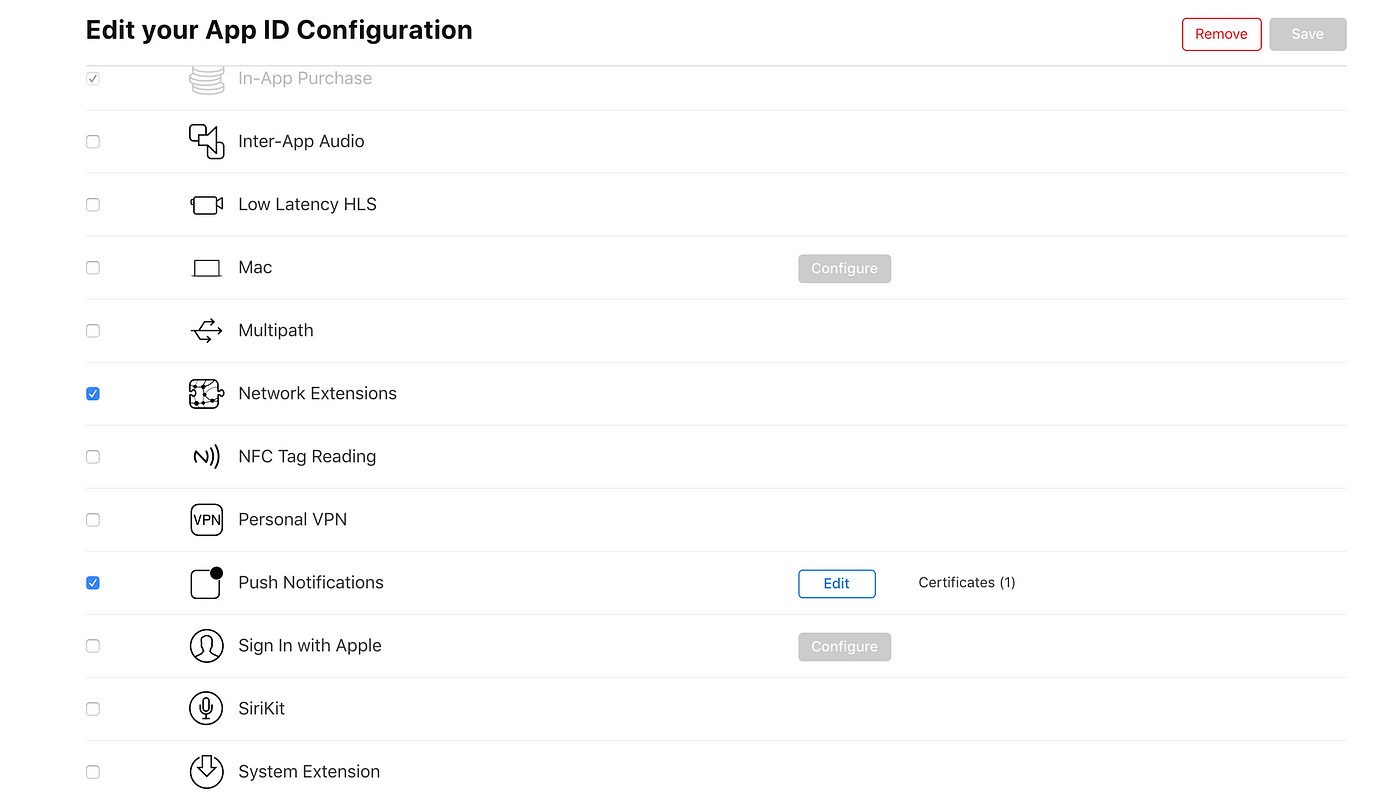
Using Apple Developer Account
You can edit your App ID configurations in Certificates, Identifiers & Profiles.
Using Xcode
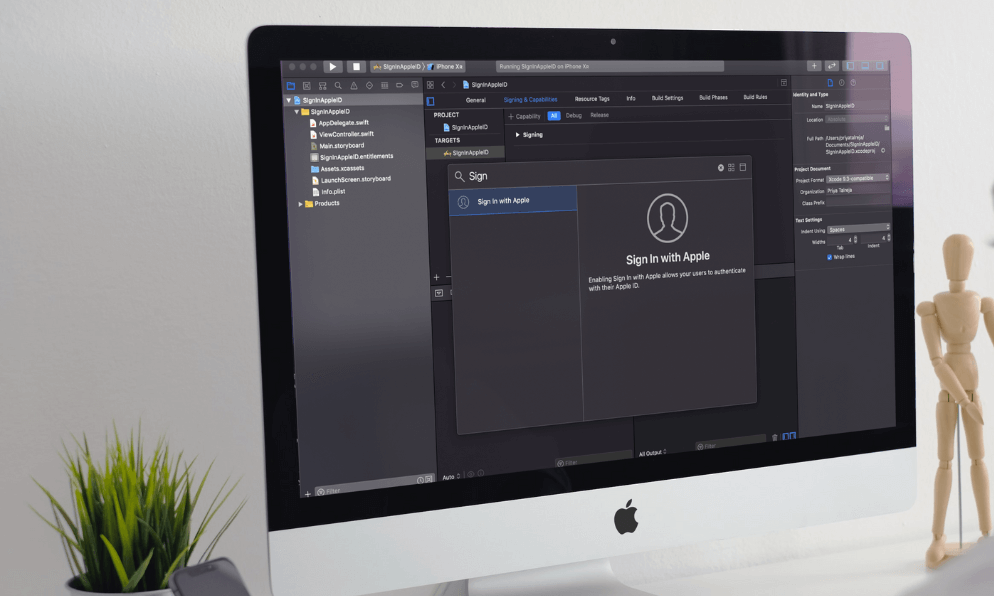
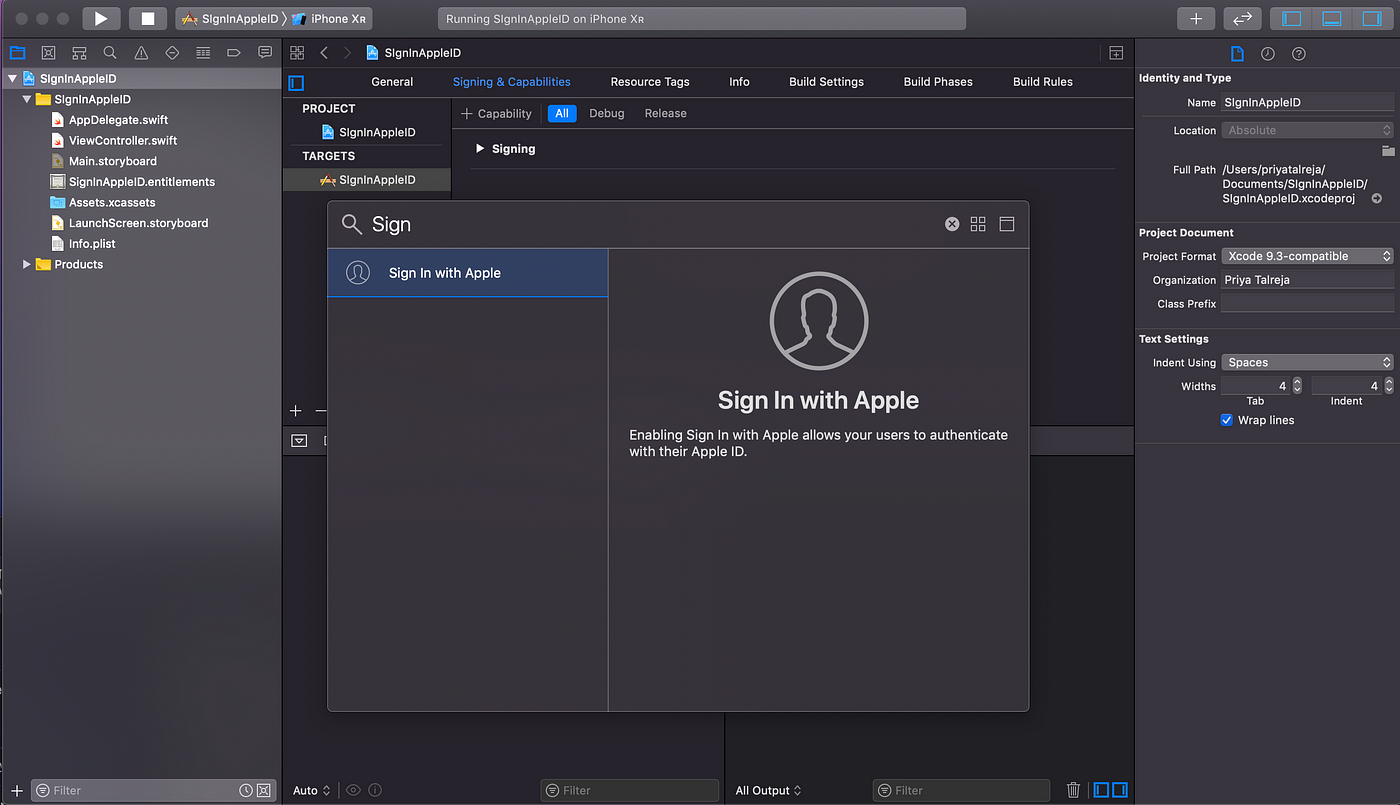
- Open your Xcode Project.
- Project Navigator→ Select Project → Select Target.
- In Project Editor, Click Signing & Capabilities.
- Add Capability by clicking the + button. Search for Sign In with Apple Capability in Capability Library.
- Double-click the capability to add.
Sign In with Apple Entitlement
You need to add entitlement if you enable capability using apple developer account. If you configure capabilities using Xcode, Xcode manages the related entitlements so you don’t need to edit the entitlements file or an App ID directly.
<?xml version=”1.0" encoding=”UTF-8"?>
<!DOCTYPE plist PUBLIC “-//Apple//DTD PLIST 1.0//EN”“http://www.apple.com/DTDs/PropertyList-1.0.dtd">
<plist version=”1.0">
<dict>
<key>com.apple.developer.applesignin</key>
<array>
<string>Default</string>
</array>
</dict>
</plist>
Sign In Set up and Functionality
We need to use Authentication Services framework to give users the ability to sign into your services with their Apple ID.
import AuthenticationServices
Add Sign In with Apple Button.
func setUpSignInAppleButton() {  let authorizationButton = ASAuthorizationAppleIDButton()  authorizationButton.addTarget(self, action: #selector(handleAppleIdRequest), for: .touchUpInside)  authorizationButton.cornerRadius = 10  //Add button on some view or stack
  self.signInButtonStack.addArrangedSubview(authorizationButton)
}
Function to create a request using ASAuthorizationAppleIDProvider and initialize a controller ASAuthorizationController to perform the request.
@objc func handleAppleIdRequest() {let appleIDProvider = ASAuthorizationAppleIDProvider()let request = appleIDProvider.createRequest()request.requestedScopes = [.fullName, .email]let authorizationController = ASAuthorizationController(authorizationRequests: [request])authorizationController.delegate = selfauthorizationController.performRequests()}
Conform to ASAuthorizationControllerDelegate
Below function is called after successful Sign In.
func authorizationController(controller: ASAuthorizationController, didCompleteWithAuthorization authorization: ASAuthorization) {if let appleIDCredential = authorization.credential as? ASAuthorizationAppleIDCredential {let userIdentifier = appleIDCredential.userlet fullName = appleIDCredential.fullNamelet email = appleIDCredential.emailprint(“User id is \(userIdentifier) \n Full Name is \(String(describing: fullName)) \n Email id is \(String(describing: email))”) }}
You can handle error in the below function.
func authorizationController(controller: ASAuthorizationController, didCompleteWithError error: Error) {// Handle error.}
Check Credential State
On successful authorization, we get User Info which has User Identifier.
We can use that identifier to check the user’s credential state by calling the getCredentialState(forUserID:completion:) method:
let appleIDProvider = ASAuthorizationAppleIDProvider()
appleIDProvider.getCredentialState(forUserID: userID) {  (credentialState, error) in
     switch credentialState {
        case .authorized:
            // The Apple ID credential is valid.
            break
        case .revoked:
            // The Apple ID credential is revoked.
            break
        case .notFound:
            // No credential was found, so show the sign-in UI.
        default:
            break
     }
}
Sign In with Apple is Complete!
Source: Medium


