 Blogs
Blogs

Speed Up React Development With Refine
he React-based Refine framework can help you build data-intensive web apps faster, providing many features you will surely need, and this article will show you how to take advantage of it.
Refine is an open-source, React-based framework used for building data-intensive front-end web applications expeditiously. It excels at eliminating repetitive CRUD tasks by providing critical functionalities like routing, authentication, internalization, and state management out of the box.
Refine offers developers total control over styling and customization options. It is decoupled from UI components and business logic and works smoothly with powerful custom design systems like Ant Design, Chakra UI, and Mantine. It also offers a collection of auxiliary hooks, components, and service providers independent of the UI components and business logic employed in your application. This gives you flexibility in customizing your application.
Thanks to its service providers, you can quickly connect to any REST or GraphQL backend as well as the majority of BAAS (Backend as a Service) providers.
In this article, we’ll illustrate how to use Refine to quickly create a simple CRUD react application.
Why use Refine?
Refine speeds development by creating a higher abstraction of most functionalities such as routing, data providers, authentication, and many others that developers would have to set up from scratch if building the application from the fundamental level. This enables developers to focus more on their application’s business logic than the project’s setup and organization.
It can be used to build heavy data applications like admin panels, dashboards, internal tools, and storefronts. It seamlessly connects with popular backend services such as GraphQL, Airtable, Strapi, Appwrite, Supabase, and many more. A Refine application can be created with a single CLI command.
Before we can begin, you will need the following development tools to set up your work:
- Node.js (version 16 and above) installed.
- A code editor.
You can select the UI framework of your choice to speed up your UI development. Read the API reference for the UI frameworks for more information and guidance.
In this tutorial, I will work with the headless approach without using any UI framework. We will set up TailwindCSS as our CSS library for styling the application.
Refine Constituents
Before starting our application, here are some main concepts we might encounter and must familiarize ourselves with when working with Refine.
The <Refine/> component
The <Refine/> component is where we add the required configurations that the Refine application needs.
<Refine
  dataProvider={dataProvider("https://api.fake-rest.refine.dev")}
  routerProvider={routerProvider}
  resources={[
    {
      name: "posts",
      list: "/posts",
      show: "/posts/show/:id",
      create: "/posts/create",
      edit: "/posts/edit/:id",
    },
  ]}
  options={{
    syncWithLocation: true,
    warnWhenUnsavedChanges: true,
  }}
>
  ...
</Refine>;
The Refine component accepts configurations like the dataProviders, the routeProviders, and the resources.
Data provider
A data provider bridges Refine and an API or backend service. It specifies how data is retrieved from an API or service and contributes to managing how the data is received and stored in the client state of the Refine application.
A Refine data provider retrieves and posts data through the following methods:
const dataProvider = {
  create: ({ resource, variables, metaData }) => Promise,
  createMany: ({ resource, variables, metaData }) => Promise,
  deleteOne: ({ resource, id, variables, metaData }) => Promise,
  deleteMany: ({ resource, ids, variables, metaData }) => Promise,
  getList: ({ resource, pagination, hasPagination, sort, filters, metaData }) =>
    Promise,
  getMany: ({ resource, ids, metaData }) => Promise,
  getOne: ({ resource, id, metaData }) => Promise,
  update: ({ resource, id, variables, metaData }) => Promise,
  updateMany: ({ resource, ids, variables, metaData }) => Promise,
  custom: ({ url, method, sort, filters, payload, query, headers, metaData }) =>
    Promise,
  getApiUrl: () => "",
};
These methods are necessary for Refine to perform data operations. Refine consumes these methods via data hooks. Each method has corresponding hooks that trigger them. There are several data hooks, and you can read up on them in the Refine documentation here.
To activate the data provider in Refine, we have to pass the data provider to the components:
<Refine
  routerProvider={routerBindings}
  dataProvider={dataProvider("https://api.fake-rest.refine.dev")}
>
  ...
</Refine>;
Read this documentation for more information on the data provider.
Resource
A resource connects the app’s data layer and page layer. A resource is a data entity that can be accessed, managed, and used to carry out CRUD operations. We must pass the resource prop to the <Refine/> components to initialize the app.
Our application App.tsx file will be displayed as the example below:
import { Refine } from "@refinedev/core";
import routerBindings, {
  UnsavedChangesNotifier,
} from "@refinedev/react-router-v6";
import dataProvider from "@refinedev/simple-rest";
import { BrowserRouter, Outlet, Route, Routes } from "react-router-dom";
import { List, Create, Edit, View } from "pages/posts";

function App() {
  return (
    <Refine
      routerProvider={routerBindings}
      dataProvider={dataProvider("https://api.fake-rest.refine.dev")}
      resources={[
        {
          name: "posts",
          list: "/posts",
          show: "/posts/show/:id",
          create: "/posts/create",
          edit: "/posts/edit/:id",
        },
      ]}
      options={{
        syncWithLocation: true,
        warnWhenUnsavedChanges: true,
      }}
    >
      <Routes>
        <Route path="posts">
          <Route index element={
            <List />
          } />
          <Route
            path="show/:id"
            element={<View />}
          />
          <Route
            path="edit/:id"
            element={<Edit />}
          />
          <Route path="create" element={<Create />} />
        </Route>
      </Routes>
      <UnsavedChangesNotifier />
    </Refine>
  );
}

export default App;
The resource property accepts an array of objects. Each object specifies the route name for the page and the fundamental operations the pages under that route name can carry out. These operations are basic CRUD operations, where the list property signifies listing records on a page, the create property signifies a page where one can create a record, the edit property signifies a page where one can update a record, and show signifies a page where one can retrieve a single record from an API or service.
View the documentation here to get more information about using a resource.
Bootstrapping your Refine Application
There are two ways to generate a custom Refine application:
- Bootstrapping with the
Refine CLIand - Secondly is using the
create react appapproach.
I will use the Refine CLI in this tutorial to create our application.
To use this, run the following command below:
npm create refine-app@latest -- -o refine-headless <name of application>After running the command, you will be directed to the CLI wizard. Select the following options to complete the CLI wizard:
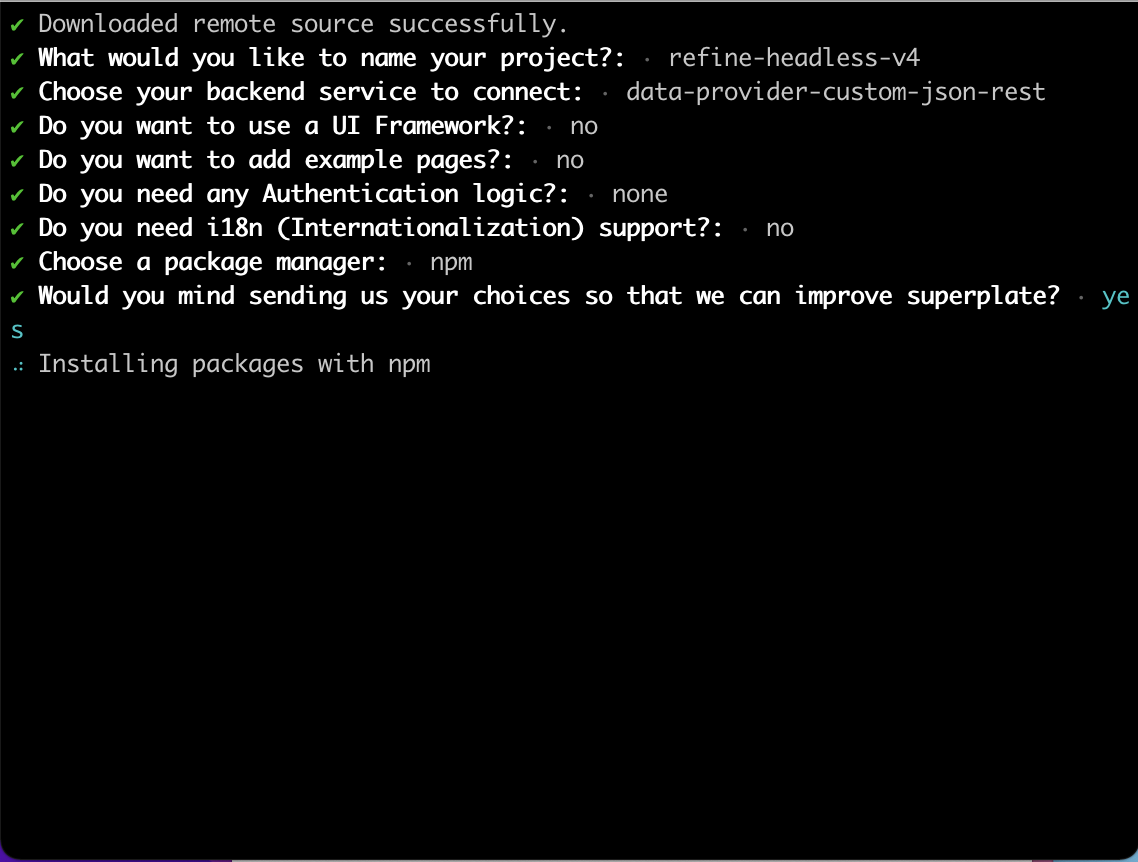
In the wizard selection above, we selected the data-provider-custom-json-rest provider as the backend service we will connect to.
The custom-json-rest provider lets us add a custom rest API endpoint to Refine’s data provider. By default, on selecting the custom-json-rest provider, Refine adds a demo API https://api.fake-rest.refine.dev. This API is a simple REST API developed by the Refine team and is used for demo purposes.
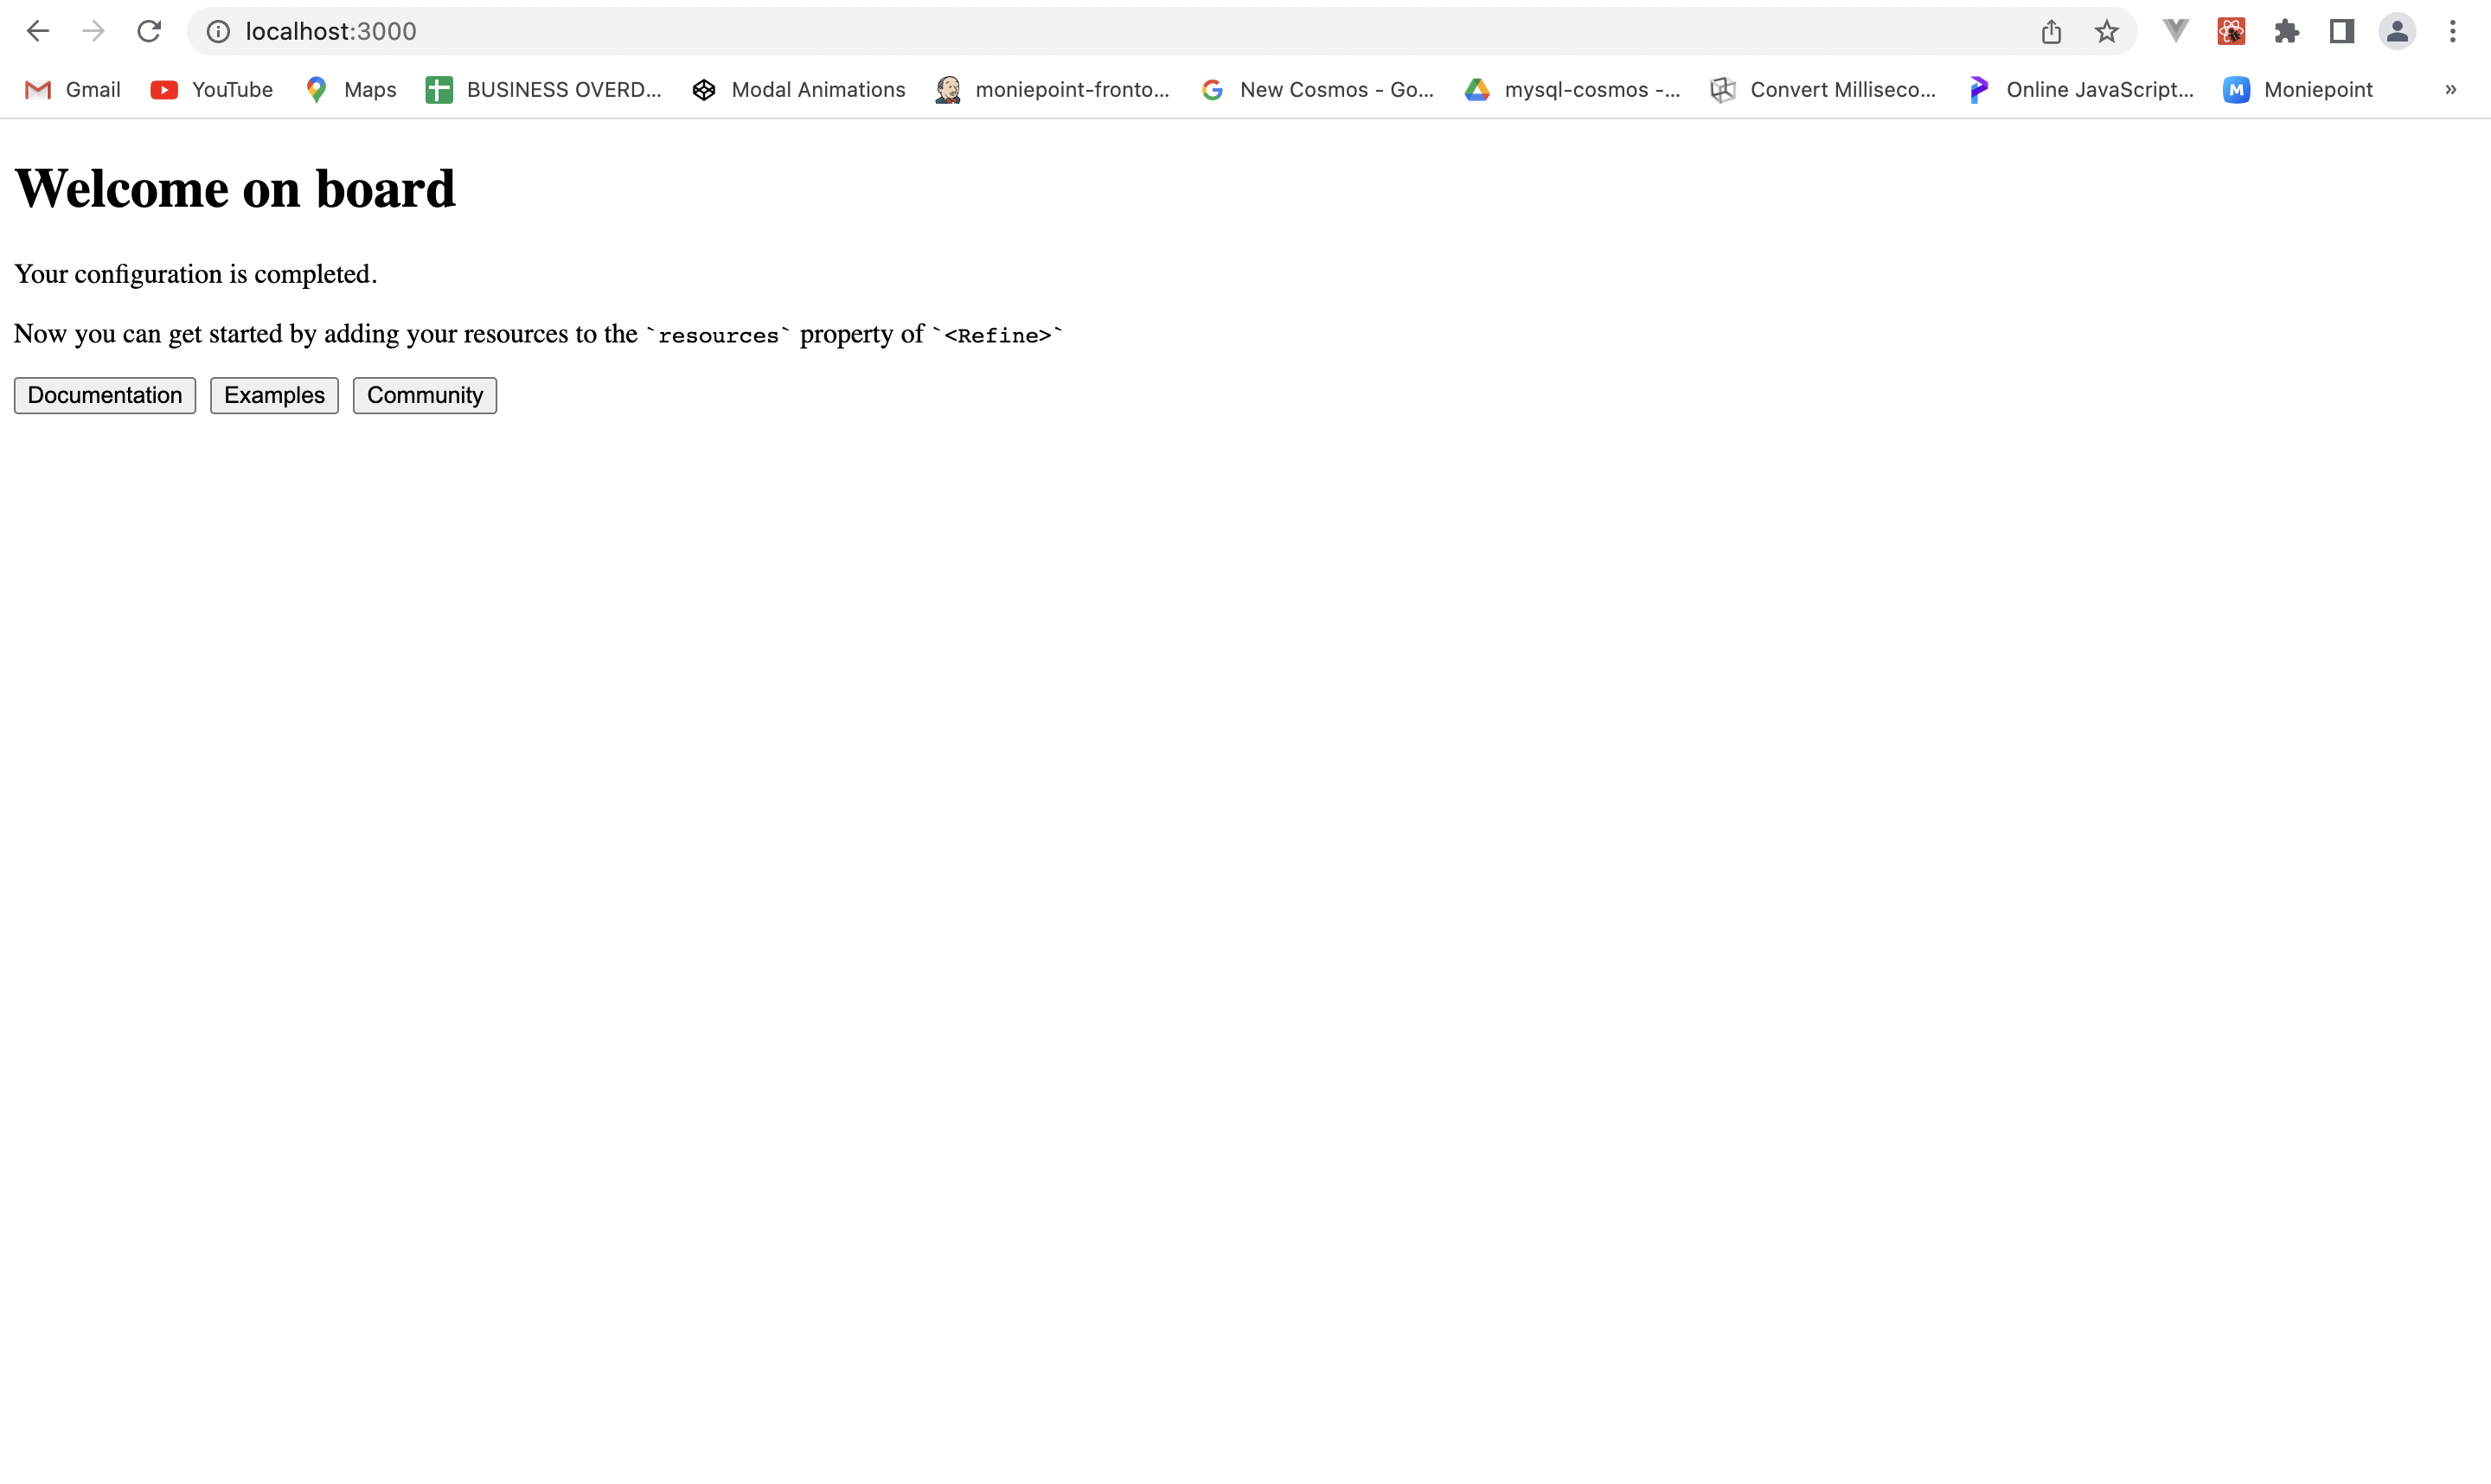
After installation, launch your dev server by running the following command:
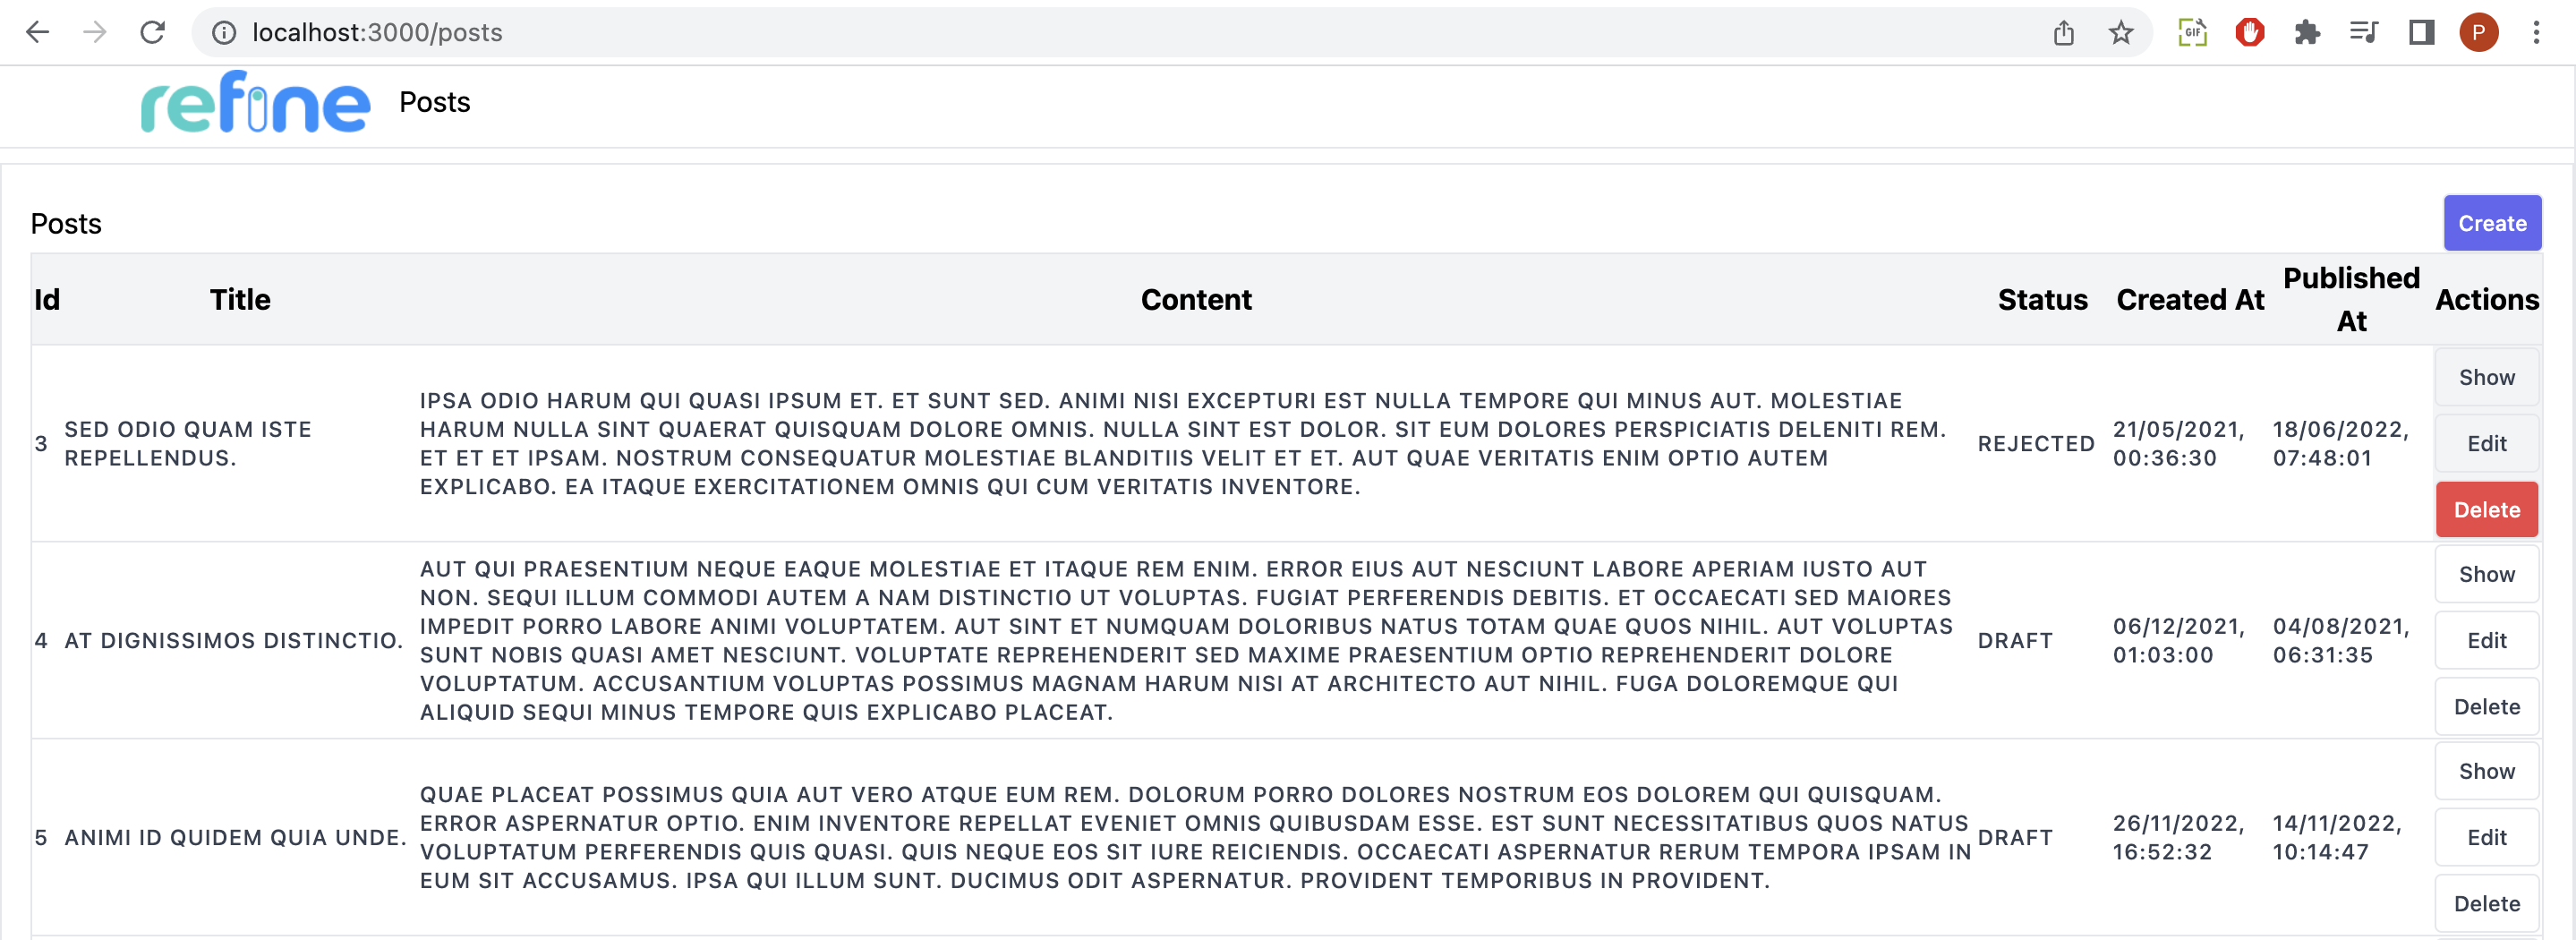
npm run devYour application should be running in dev mode. Visit http://localhost:3000 to preview your website in your default browser. It should look like this:
Following installation, we will set up TailwindCSS as the application’s CSS library. Because we will not use a UI framework, we will style with Tailwind. Since a Refine application is based on React, the procedure used in adding TailwindCSS to a React application can also be applied to a Refine application. To add Tailwind CSS to a React application, visit here.
Implementing our CRUD operations
In this section, we will implement basic CRUD operations such as creating, listing, deleting, and retrieving records by building a simple admin application that handles these CRUD operations.
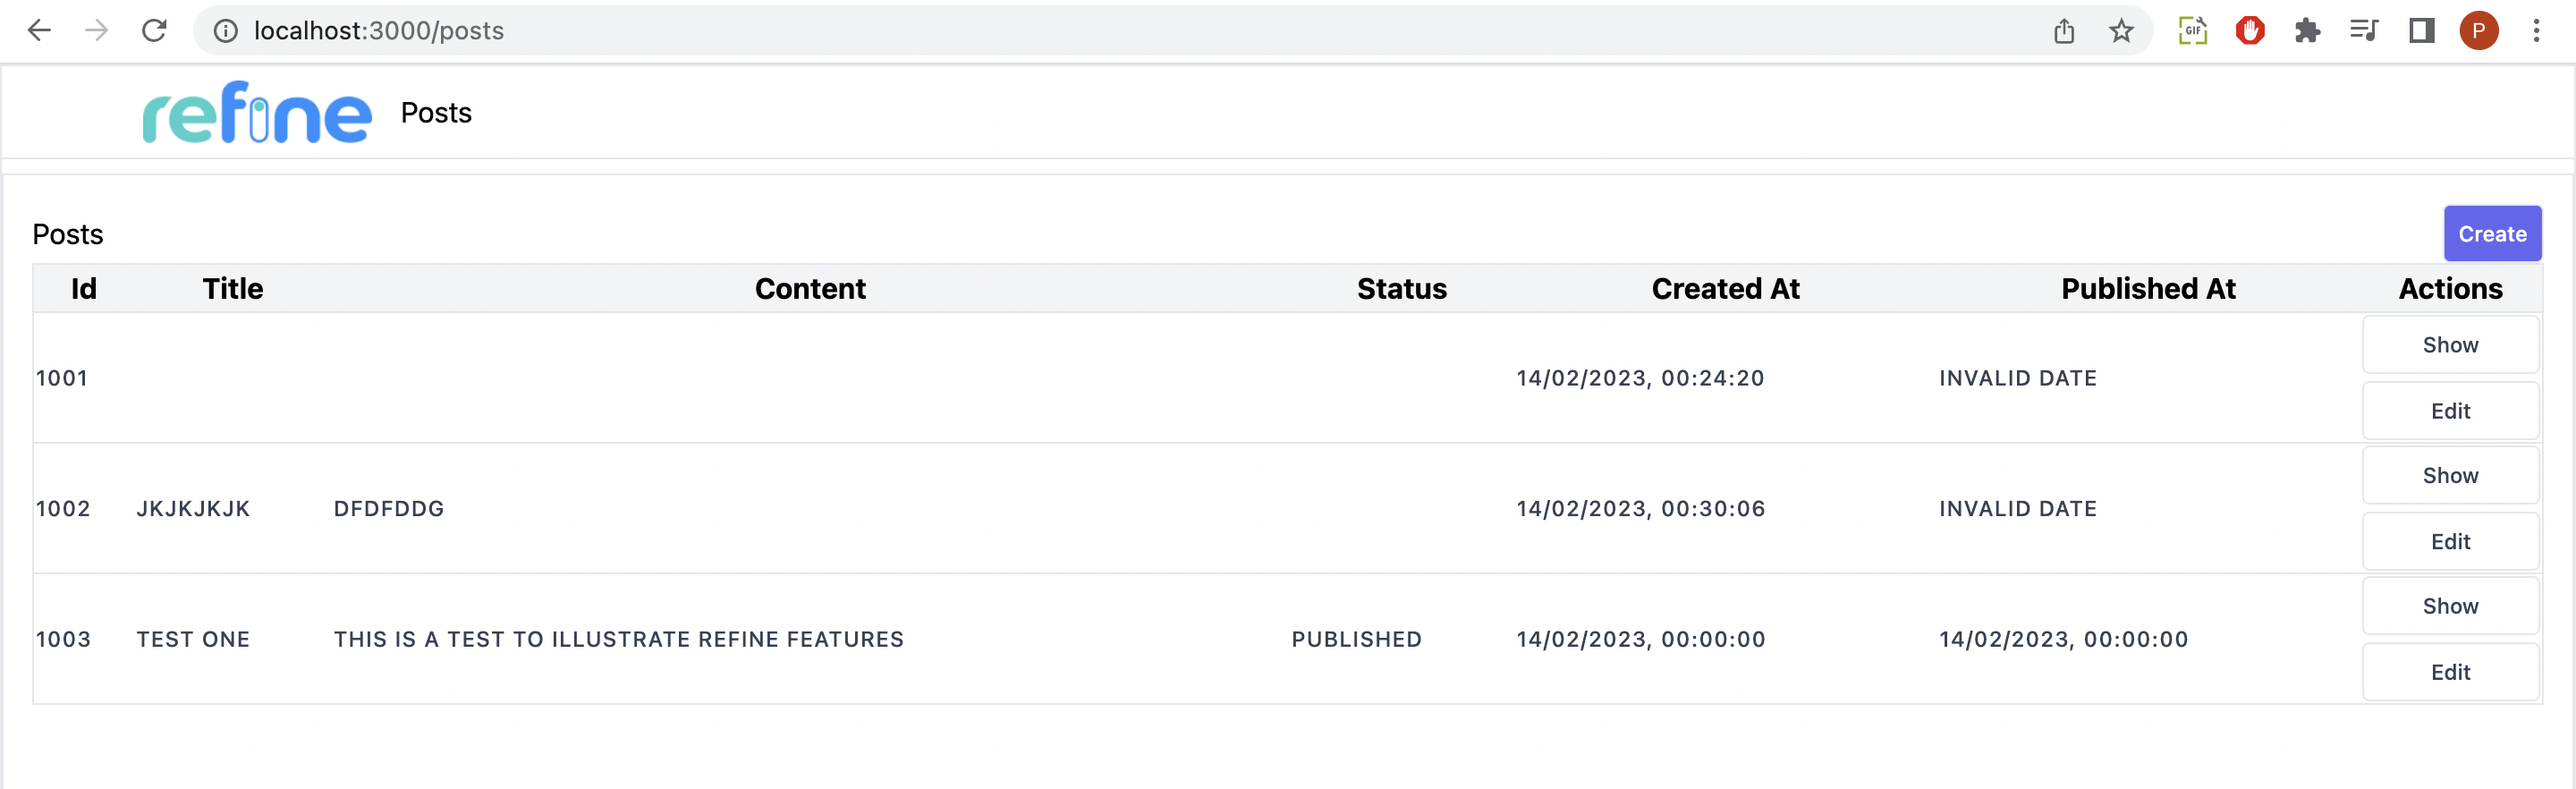
Listing blog records
To begin with, to display all records in a table format, we will install Tanstack react-table and use the ColumnDef and flexRender methods to render columns and column headers. Run the following command to set up the table:
npm i react-tableThen, create a new folder called pages under the src folder in the application. In the pages folder, we will create a list.tsx file and add the code below:
import React from "react";
import {
  IResourceComponentsProps,
  useNavigation,
  useDelete,
} from "@refinedev/core";
import { useTable } from "@refinedev/react-table";
import { ColumnDef, flexRender } from "@tanstack/react-table";

export const PostList: React.FC<IResourceComponentsProps> = () => {
  const columns = React.useMemo<ColumnDef<any>[]>(
    () => [
      {
        id: "id",
        accessorKey: "id",
        header: "Id",
      },
    ],
    []
  );
  const { edit, show, create } = useNavigation();
  const { mutate } = useDelete();

  const {
    getHeaderGroups,
    getRowModel,
    setOptions,
    refineCore: {
      tableQueryResult: { data: tableData },
    },
  } = useTable({
    columns,
  });
  setOptions(prev) => ({
    ...prev,
    meta: {
      ...prev.meta,
    },
  }));
  return (
    <div>
      <div>
        <h1>Posts</h1>
        <button
          className="flex items-center justify-between gap-1 rounded border border-gray-200 bg-indigo-500 p-2 text-xs font-medium leading-tight text-white transition duration-150 ease-in-out hover:bg-indigo-600"
          onClick={() => create("posts")}
        >
          Create
        </button>
      </div>
      <div style={{ maxWidth: "100%", overflowY: "scroll" }}>
        <table className="min-w-full table-fixed divide-y divide-gray-200 border">
          <thead className="bg-gray-100">
            {getHeaderGroups().map(headerGroup) => (
              <tr key={headerGroup.id}>
                {headerGroup.headers.map(header) => (
                  <th key={header.id}>
                    {!header.isPlaceholder &&
                      flexRender(
                        header.column.columnDef.header,
                        header.getContext()
                      )}
                  </th>
                ))}
              </tr>
            ))}
          </thead>
          <tbody className="divide-y divide-gray-200 bg-white">
            {getRowModel().rows.map(row) => (
              <tr
                key={row.id}
                className="py-3 px-6 text-left text-xs font-medium uppercase tracking-wider text-gray-700"
              >
                {row.getVisibleCells().map(cell) => (
                  <td key={cell.id} className="transition hover:bg-gray-100">
                    {flexRender(cell.column.columnDef.cell, cell.getContext())}
                  </td>
                ))}
              </tr>
            ))}
          </tbody>
        </table>
      </div>
    </div>
  );
};
In the code above,
- The
useTable()hook from the@refinedev/react-tablepackage retrieves records from the endpoint. - The
columnsvariable is responsible for mapping the data obtained from the endpoint into rows. It returns an array of objects, each defining theheaderidand the name of the generated row. Thecolumnsvariable is subsequently added to theuseTable()hook to map the data into rows. - The
getHeaderGroups()function from theuseTable()hook obtains theheaderinformation defined on each object returned in thecolumnsvariable. - The
getRowModel()presents the endpoint data as rows. - The
useNavigationhook simply handles the routing to other pages like theeditpage,createpage, andshowpage by clicking the action buttons on the columns variable mapped into the rows. It is obtained from the Refine core package and is a higher abstraction of thereact-routerhook. - The
useDelete()hook handles the deletion of posts by clicking thedeleteaction buttons on the columns variable, which was mapped into the rows. It provides amutate()method that handles the deletion.
After this, we can now add the component <PostList/> to the list.tsx file to our resource present in the app.tsx file, as shown below:
import { Refine } from "@refinedev/core";
import routerBindings, {
  UnsavedChangesNotifier,
} from "@refinedev/react-router-v6";
import dataProvider from "@refinedev/simple-rest";
import { BrowserRouter, Outlet, Route, Routes } from "react-router-dom";
import { HeadlessInferencer } from "@refinedev/inferencer/headless";
import { Layout } from "components/Layout";
import { PostList } from "pages/list";

const App = () => {
  return (
    <BrowserRouter>
      <Refine
        routerProvider={routerBindings}
        dataProvider={dataProvider("https://api.fake-rest.refine.dev")}
        resources={[
          {
            name: "posts",
            list: "/posts",
            show: "",
            create: "",
            edit: "",
          },
        ]}
        options={{
          syncWithLocation: true,
          warnWhenUnsavedChanges: true,
        }}
      >
        <Routes>
          <Route path="posts"
            element={
              <Layout>
                <Outlet/>
              </Layout>
            }
          >
            <Route index element={
              <PostList />
            } />
          </Route>
        </Routes>
        <UnsavedChangesNotifier />
      </Refine>
    </BrowserRouter>
  );
};
export default App;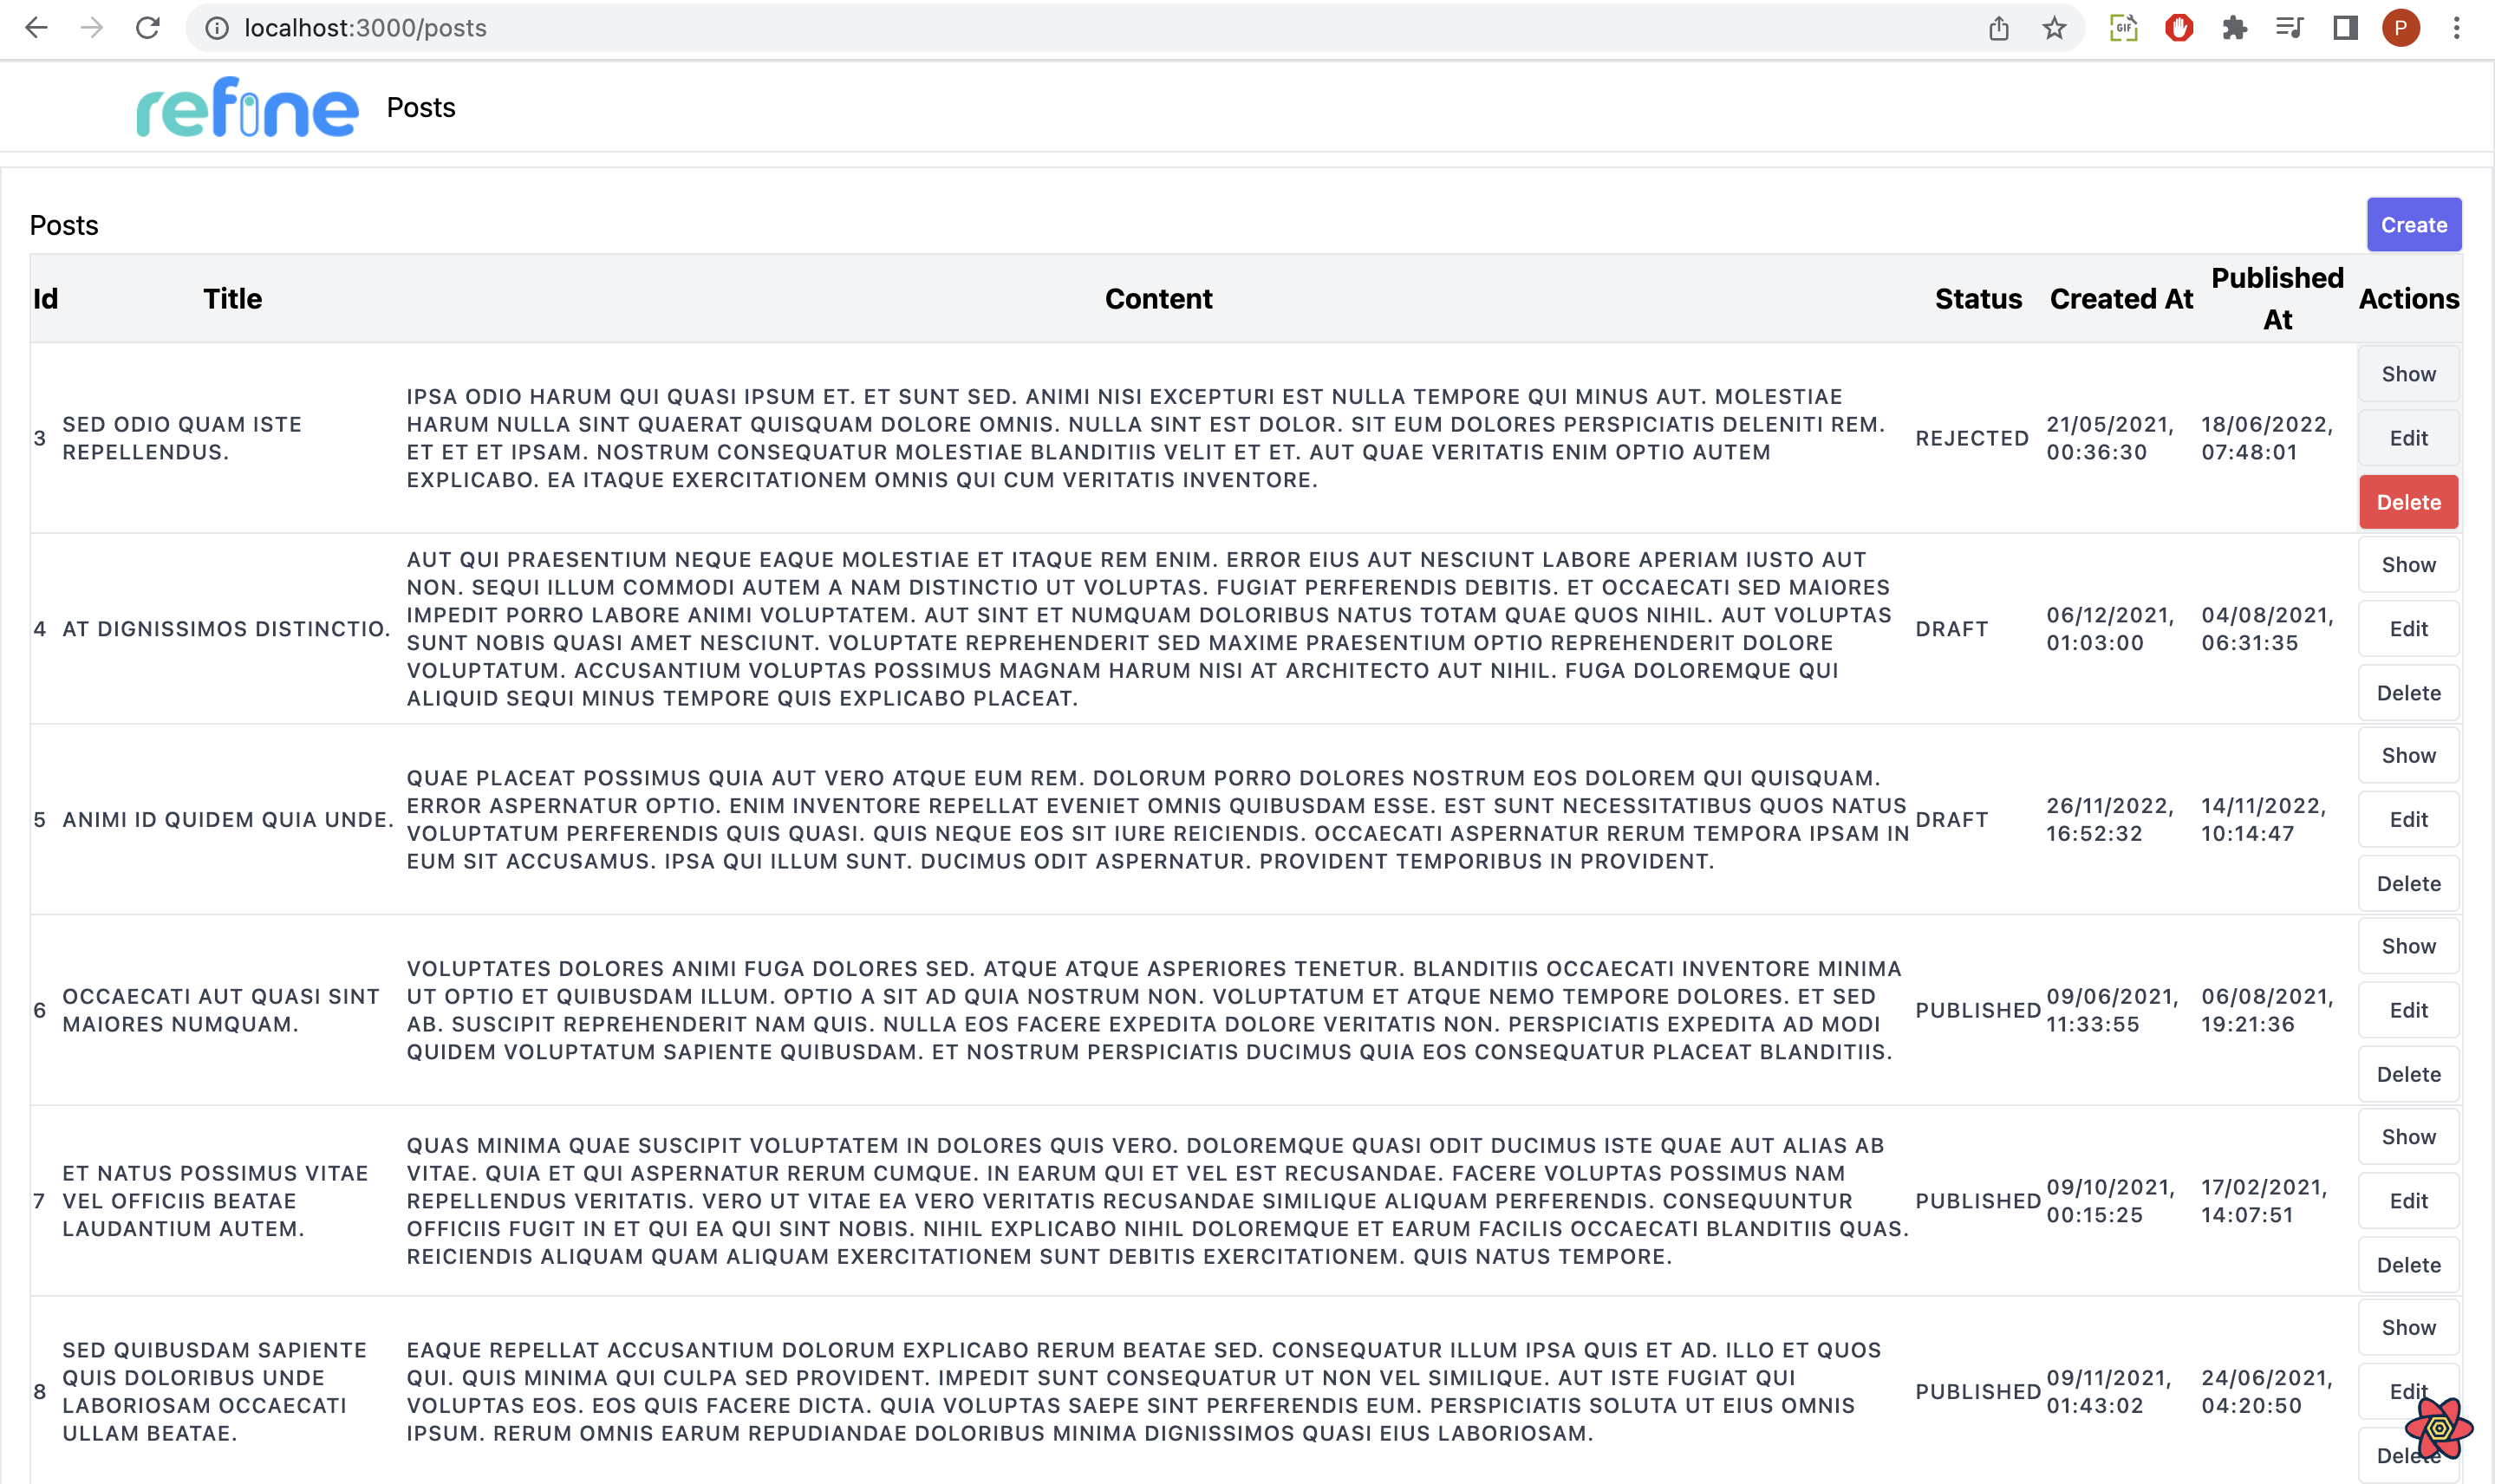
Session Replay for Developers
Uncover frustrations, understand bugs and fix slowdowns like never before with OpenReplay — an open-source session replay tool for developers. Self-host it in minutes, and have complete control over your customer data. Check our GitHub repo and join the thousands of developers in our community. https://ghbtns.com/github-btn.html?user=openreplay&repo=openreplay&type=star&count=true&size=small
View single blog records
Next, to view records, we create a show.tsx file in the pages folder under the src folder in the application and add the code below to the file:
export const PostShow = () => {
  const { edit, list } = useNavigation();
  const { id } = useResource();
  const { queryResult } = useShow();
  const { data, isLoading } = queryResult;
  const record = data?.data;

  return (
    <div style={{ padding: "16px" }}>
      <div>
        <div className="mb-2 block text-sm font-medium mr-1.5">
          <h5>Id</h5>
          <div className="block w-full rounded-lg border border-gray-300 bg-gray-50 p-2.5 text-sm">
            {record?.id ?? ""}
          </div>
        </div>
        <div className="mb-2 block text-sm font-medium mr-1.5">
          <h5>Title</h5>
          <div className="block w-full rounded-lg border border-gray-300 bg-gray-50 p-2.5 text-sm">
            {record?.title}
          </div>
        </div>
        <div className="mb-2 block text-sm font-medium mr-1.5">
          <h5>Content</h5>
          <p className="block w-full rounded-lg border border-gray-300 bg-gray-50 p-2.5 text-sm">
            {record?.content}
          </p>
        </div>
        <div className="mb-2 block text-sm font-medium mr-1.5">
          <h5>Status</h5>
          <div className="block w-full rounded-lg border border-gray-300 bg-gray-50 p-2.5 text-sm">
            {record?.status}
          </div>
        </div>
        <div className="mb-2 block text-sm font-medium mr-1.5">
          <h5>Created At</h5>
          <div className="block w-full rounded-lg border border-gray-300 bg-gray-50 p-2.5 text-sm">
            {new Date(record?.createdAt).toLocaleString(undefined, {
              timeZone: "UTC",
            })}
          </div>
        </div>
        <div className="mb-2 block text-sm font-medium mr-1.5">
          <h5>Published At</h5>
          <div className="block w-full rounded-lg border border-gray-300 bg-gray-50 p-2.5 text-sm">
            {new Date(record?.publishedAt).toLocaleString(undefined, {
              timeZone: "UTC",
            })}
          </div>
        </div>
      </div>
    </div>
  );
};
In the code above,
- We used the
useShow()hook from the@refinedev/corepackage to find a specific post based on itsid. - After obtaining the specific post, it maps it into the
queryResultvariable, which is subsequently used to map the post to the page. - The
useNavigationhook simply handles the routing to other pages like theeditpage and thelistpage.
After this, we can now add the component <PostShow/> to the show.tsx file to our resource present in the app.tsx file, as shown below:
import { Refine } from "@refinedev/core";
import routerBindings, {
  UnsavedChangesNotifier,
} from "@refinedev/react-router-v6";
import dataProvider from "@refinedev/simple-rest";
import { BrowserRouter, Outlet, Route, Routes } from "react-router-dom";
import { HeadlessInferencer } from "@refinedev/inferencer/headless";
import { Layout } from "components/Layout";
import { PostList } from "pages/list";
import { PostShow } from "pages/show";
import { PostCreate } from "pages/create";

const App = () => {
  return (
    <BrowserRouter>
      <Refine
        routerProvider={routerBindings}
        dataProvider={dataProvider("https://api.fake-rest.refine.dev")}
        resources={[
          {
            name: "posts",
            list: "/posts",
            show: "",
            create: "",
            edit: "",
          },
        ]}
        options={{
          syncWithLocation: true,
          warnWhenUnsavedChanges: true,
        }}
      >
        <Routes>
          <Route path="posts"
            element={
              <Layout>
                <Outlet />
              </Layout>
            }
          >
            <Route index element={
              <PostList />
            } />
            <Route
              path="show/:id"
              element={<PostShow />}
            />
          </Route>
        </Routes>
        <UnsavedChangesNotifier />
      </Refine>
    </BrowserRouter>
  );
};
export default App;
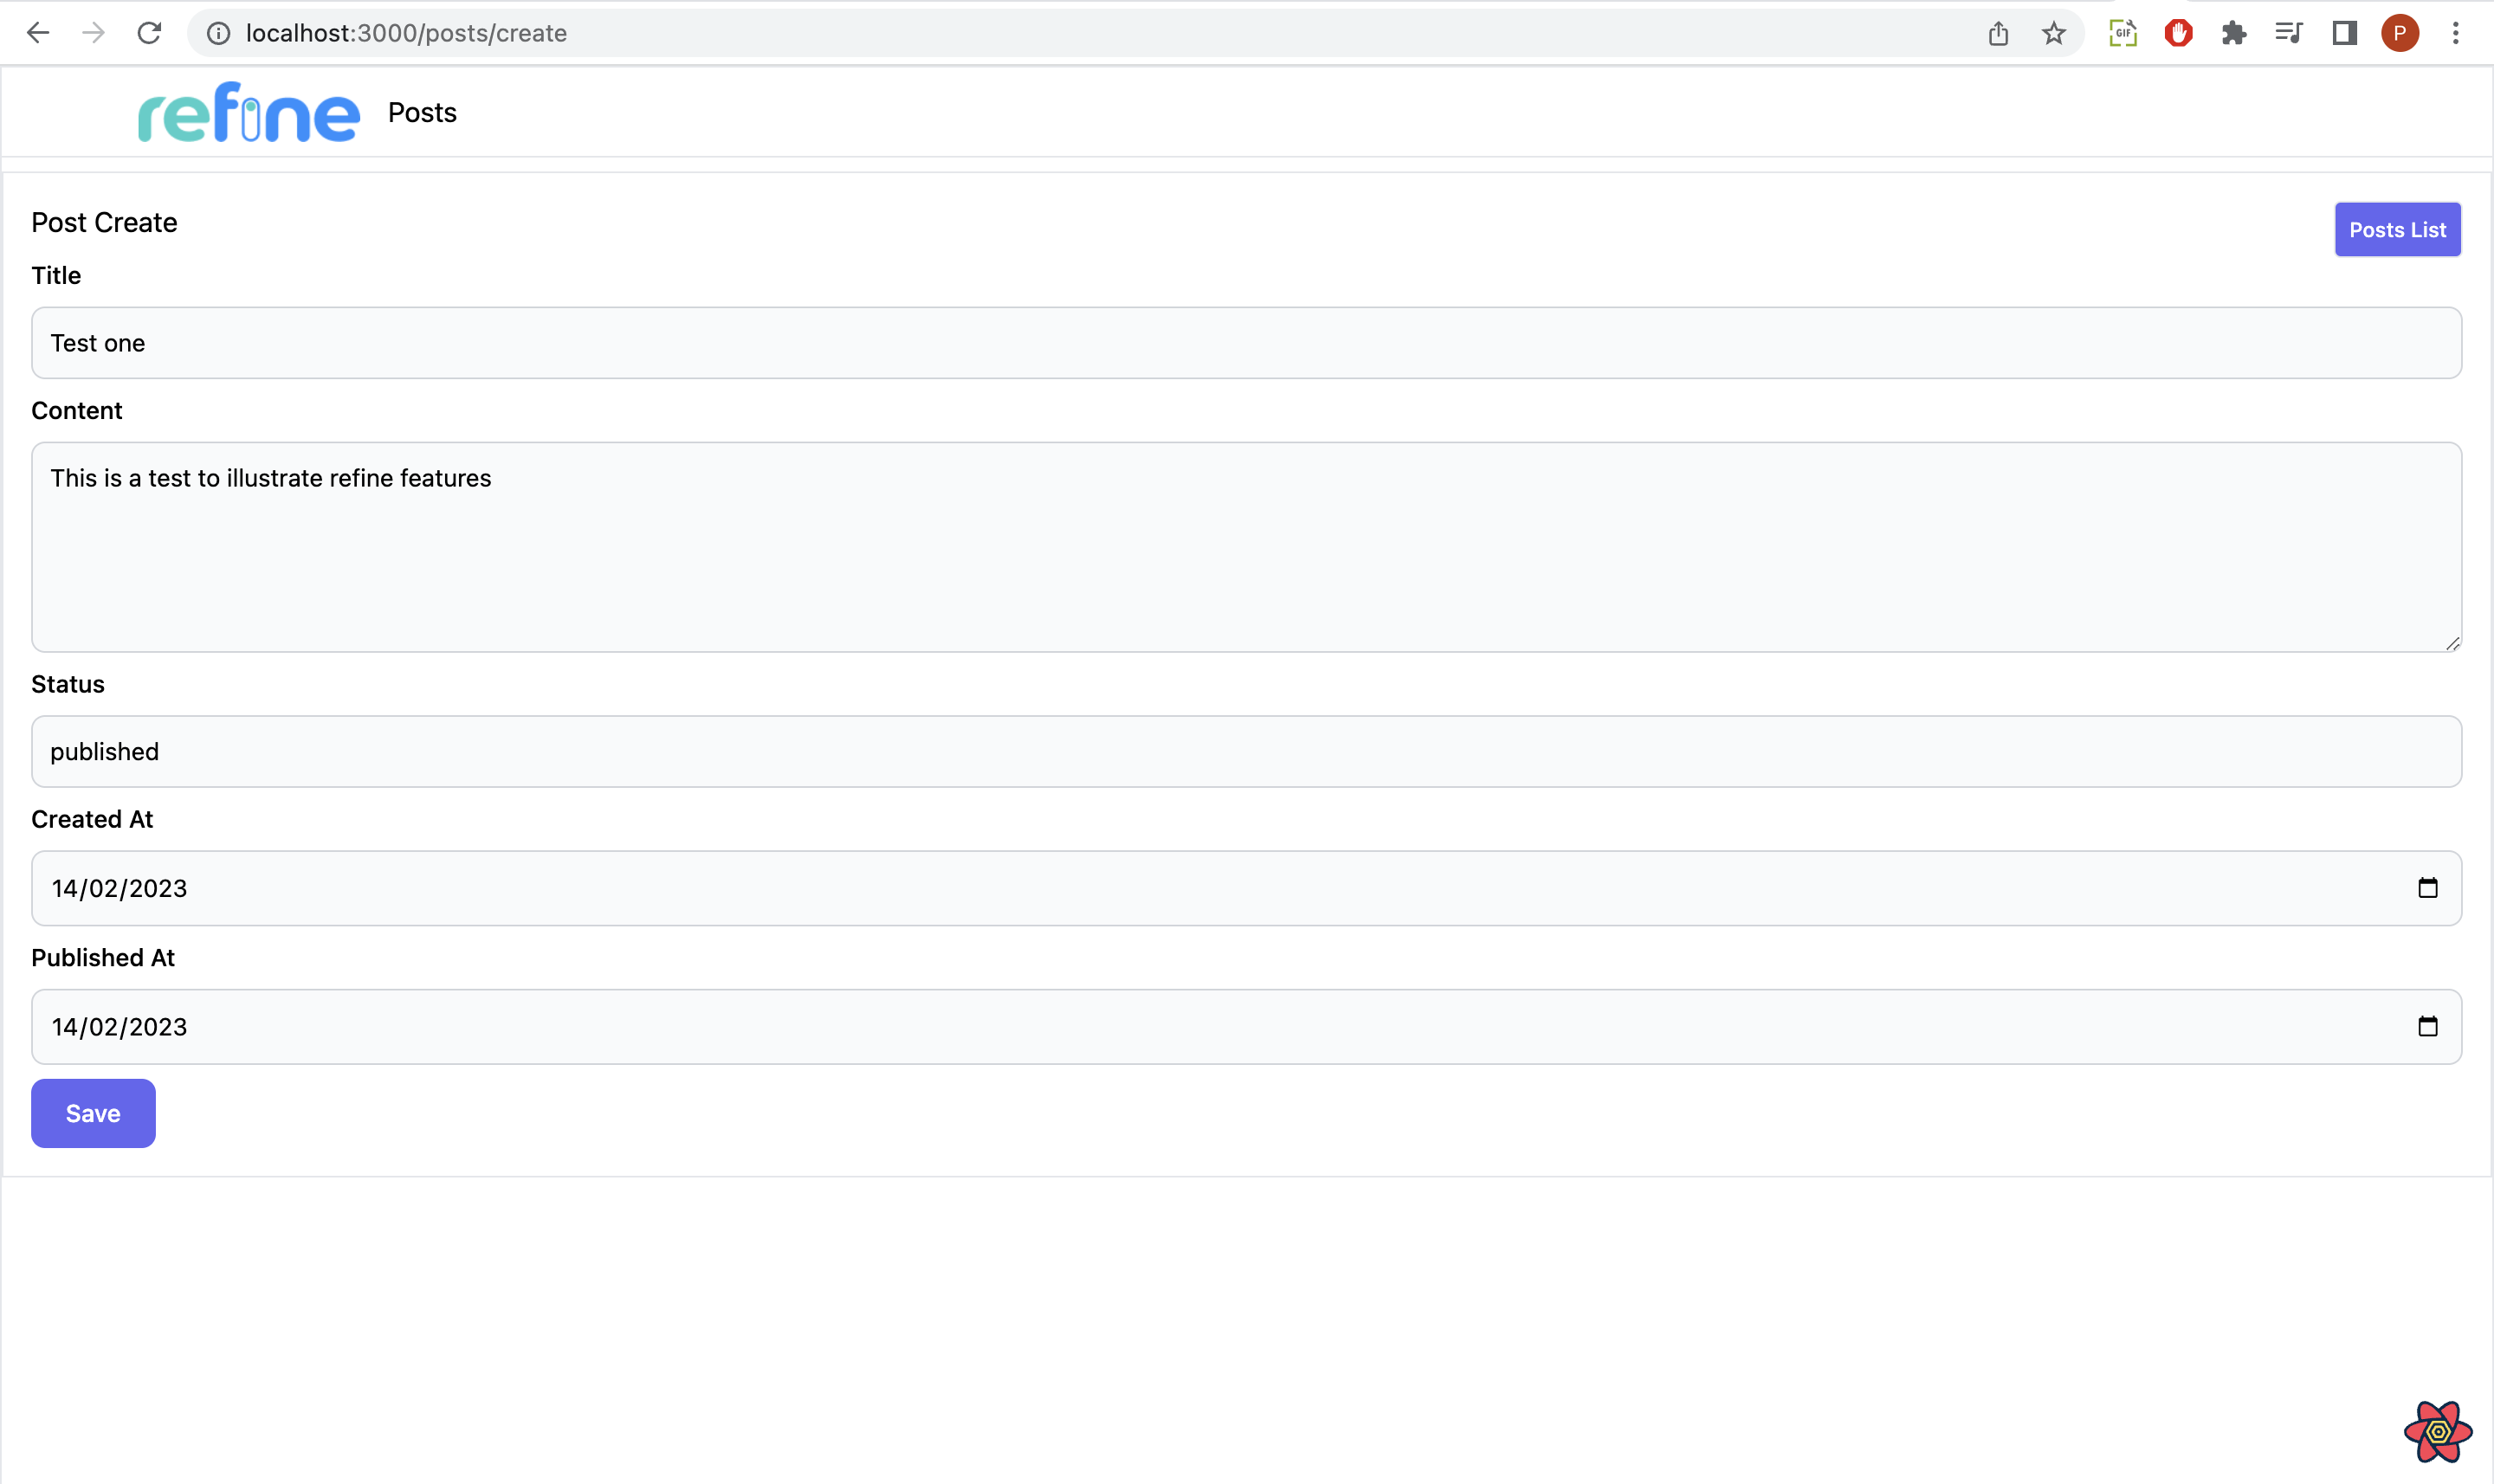
Creating blog records
To create a record, add a create.tsx file in the pages folder under the src folder in the application, and add the code below to the file:
import React from "react";
import { useNavigation } from "@refinedev/core";
import { useForm } from "@refinedev/react-hook-form";

export const PostCreate = () => {
  const { list } = useNavigation();
  const {
    refineCore: { onFinish, formLoading },
    register,
    handleSubmit,
    formState: { errors },
  } = useForm();
  return (
    <div style={{ padding: "16px" }}>
      <form onSubmit={handleSubmit(onFinish)}>
        <div>
          <label>
            <span className="mb-2 block text-sm font-medium mr-2">Title</span>
            <input
              className="block w-full rounded-lg border border-gray-300 bg-gray-50 p-2.5 text-sm"
              type="text"
              {...register("title", {
                required: "This field is required",
              })}
            />
            <span style={{ color: "red" }}>
              {(errors as any)?.title?.message as string}
            </span>
          </label>
          <label>
            <span className="mb-2 block text-sm font-medium mr-2">Content</span>
            <textarea
              className="block w-full rounded-lg border border-gray-300 bg-gray-50 p-2.5 text-sm"
              style={{ verticalAlign: "top" }}
              {...register("content", {
                required: "This field is required",
              })}
            />
            <span style={{ color: "red" }}>
              {(errors as any)?.content?.message as string}
            </span>
          </label>
          <label>
            <span className="mb-2 block text-sm font-medium mr-2">Status</span>
            <input
              className="block w-full rounded-lg border border-gray-300 bg-gray-50 p-2.5 text-sm"
              type="text"
              {...register("status", {
                required: "This field is required",
              })}
            />
            <span style={{ color: "red" }}>
              {(errors as any)?.status?.message as string}
            </span>
          </label>
          <label>
            <span className="mb-2 block text-sm font-medium mr-2">
              Created At
            </span>
            <input
              type="date"
              className="block w-full rounded-lg border border-gray-300 bg-gray-50 p-2.5 text-sm"
              {...register("createdAt", {
                required: "This field is required",
              })}
            />
            <span style={{ color: "red" }}>
              {(errors as any)?.createdAt?.message as string}
            </span>
          </label>
          <label>
            <span className="mb-2 block text-sm font-medium mr-2">
              Published At
            </span>
            <input
              type="date"
              className="block w-full rounded-lg border border-gray-300 bg-gray-50 p-2.5 text-sm"
              {...register("publishedAt", {
                required: "This field is required",
              })}
            />
            <span style={{ color: "red" }}>
              {(errors as any)?.publishedAt?.message as string}
            </span>
          </label>
          <div>
            <input
              className="flex w-full items-center rounded-lg bg-indigo-500 px-5 py-2.5 text-center text-sm font-medium text-white hover:bg-indigo-600 sm:w-auto"
              type="submit"
              value="Save"
            />
          </div>
        </div>
      </form>
    </div>
  );
};
In the code above,
- To validate the new post we will add to the endpoint, we will use methods provided by the
useForm()hook, such as theregister()methods. The hooks also include methods such ashandleSubmit()andonFinish()that handle the data submission to the endpoint.
After this, we can now add the component <PostCreate/> in the create.tsx file to our resource present in the app.tsx file as shown below:
import { Refine } from "@refinedev/core";
import routerBindings, {
  UnsavedChangesNotifier,
} from "@refinedev/react-router-v6";
import dataProvider from "@refinedev/simple-rest";
import { BrowserRouter, Outlet, Route, Routes } from "react-router-dom";
import { HeadlessInferencer } from "@refinedev/inferencer/headless";
import { Layout } from "components/Layout";
import { PostList } from "pages/list";
import { PostShow } from "pages/show";
import { PostCreate } from "pages/create";

const App = () => {
  return (
    <BrowserRouter>
      <Refine
        routerProvider={routerBindings}
        dataProvider={dataProvider("https://api.fake-rest.refine.dev")}
        resources={[
          {
            name: "posts",
            list: "/posts",
            show: "",
            create: "",
            edit: "",
          },
        ]}
        options={{
          syncWithLocation: true,
          warnWhenUnsavedChanges: true,
        }}
      >
        <Routes>
          <Route path="posts"
            element={
              <Layout>
                <Outlet />
              </Layout>
            }
          >
            <Route index element={
              <PostList />
            } />
            <Route
              path="show/:id"
              element={<PostShow />}
            />
            <Route path="create" element={<PostCreate />} />
          </Route>
        </Routes>
        <UnsavedChangesNotifier />
      </Refine>
    </BrowserRouter>
  );
};
export default App;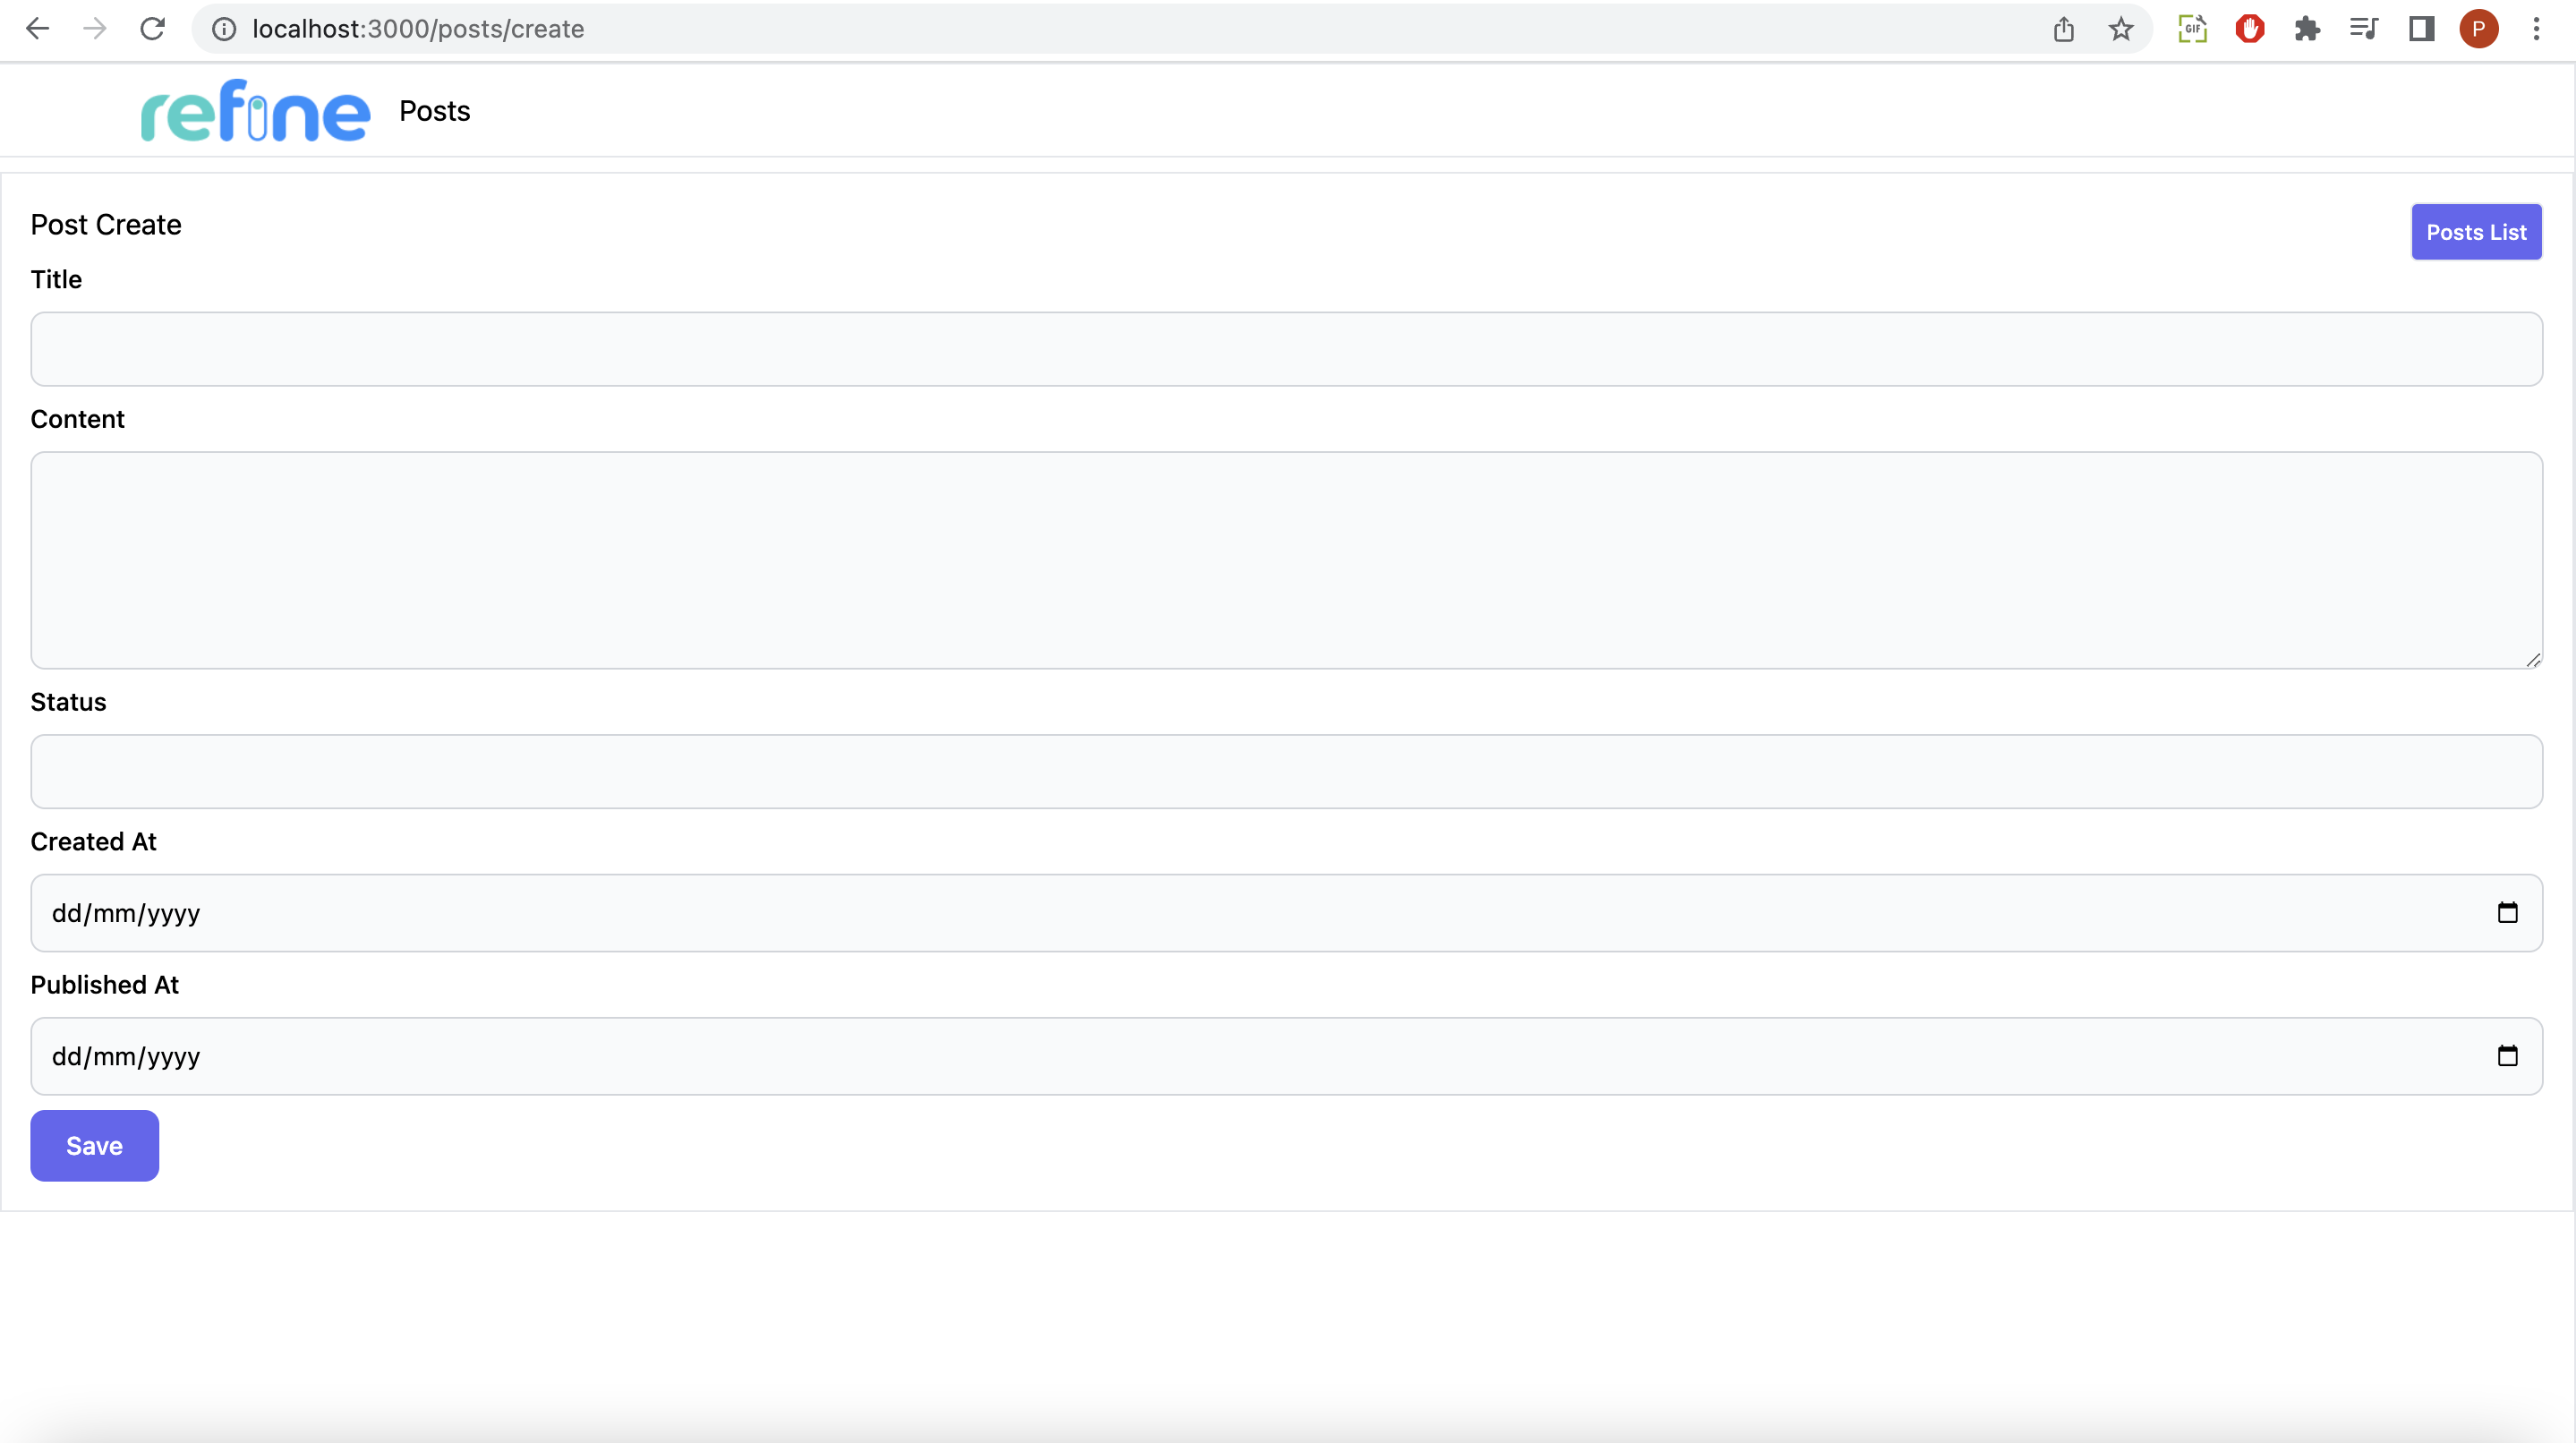
Editing blog records
For editing a record, create an edit.tsx file in the pages folder under the src folder in the application, and add the code below to the file:
import React from "react";
import { useNavigation, useSelect } from "@refinedev/core";
import { useForm } from "@refinedev/react-hook-form";

export const PostEdit = () => {
  const { list } = useNavigation();
  const {
    refineCore: { onFinish, formLoading },
    register,
    handleSubmit,
    resetField,
    formState: { errors },
  } = useForm();
  return (
    <div style={{ padding: "16px" }}>
      <div style={{ display: "flex", justifyContent: "space-between" }}>
        <h1>Post Edit</h1>
        <div>
          <button
            className="flex items-center justify-between gap-1 rounded border border-gray-200 bg-indigo-500 p-2 text-xs font-medium leading-tight text-white transition duration-150 ease-in-out hover:bg-indigo-600"
            onClick={() => {
              list("posts");
            }}
          >
            Posts List
          </button>
        </div>
      </div>
      <form onSubmit={handleSubmit(onFinish)}>
        <div
          style={{
            display: "flex",
            flexDirection: "column",
            gap: "8px",
          }}
        >
          <label>
            <span className="mb-2 block text-sm font-medium mr-2">Id</span>
            <input
              className="block w-full rounded-lg border border-gray-300 bg-gray-50 p-2.5 text-sm"
              disabled
              type="number"
              {...register("id", {
                required: "This field is required",
              })}
            />
            <span style={{ color: "red" }}>
              {(errors as any)?.id?.message as string}
            </span>
          </label>
          <label>
            <span className="mb-2 block text-sm font-medium mr-2">Title</span>
            <input
              className="block w-full rounded-lg border border-gray-300 bg-gray-50 p-2.5 text-sm"
              type="text"
              {...register("title", {
                required: "This field is required",
              })}
            />
            <span style={{ color: "red" }}>
              {(errors as any)?.title?.message as string}
            </span>
          </label>
          <label>
            <span className="mb-2 block text-sm font-medium mr-2">Content</span>
            <textarea
              className="block w-full rounded-lg border border-gray-300 bg-gray-50 p-2.5 text-sm"
              rows={5}
              cols={33}
              style={{ verticalAlign: "top" }}
              {...register("content", {
                required: "This field is required",
              })}
            />
            <span style={{ color: "red" }}>
              {(errors as any)?.content?.message as string}
            </span>
          </label>
          <label>
            <span className="mb-2 block text-sm font-medium mr-2">Status</span>
            <input
              className="block w-full rounded-lg border border-gray-300 bg-gray-50 p-2.5 text-sm"
              type="text"
              {...register("status", {
                required: "This field is required",
              })}
            />
            <span style={{ color: "red" }}>
              {(errors as any)?.status?.message as string}
            </span>
          </label>
          <label>
            <span className="mb-2 block text-sm font-medium mr-2">
              Created At
            </span>
            <input
              className="block w-full rounded-lg border border-gray-300 bg-gray-50 p-2.5 text-sm"
              {...register("createdAt", {
                required: "This field is required",
              })}
            />
            <span style={{ color: "red" }}>
              {(errors as any)?.createdAt?.message as string}
            </span>
          </label>
          <label>
            <span className="mb-2 block text-sm font-medium mr-2">
              Published At
            </span>
            <input
              className="block w-full rounded-lg border border-gray-300 bg-gray-50 p-2.5 text-sm"
              {...register("publishedAt", {
                required: "This field is required",
              })}
            />
            <span style={{ color: "red" }}>
              {(errors as any)?.publishedAt?.message as string}
            </span>
          </label>
          <div>
            <input
              className="flex w-full items-center rounded-lg bg-indigo-500 px-5 py-2.5 text-center text-sm font-medium text-white hover:bg-indigo-600 sm:w-auto"
              type="submit"
              value="Save"
            />
          </div>
        </div>
      </form>
    </div>
  );
};
In the code above:
- The
useForm()hook under the hood identifies the specific post and binds the existing data of the post into the form. - The
register()hook validates the contents inserted into the form inputs, while thehandleSubmit()andonFinish()methods handle the submission of the data to the endpoint on updating the post information.
After this, we can now add the component <PostEdit/> in the edit.tsx file to our resource present in the app.tsx file as shown below:
import { Refine } from "@refinedev/core";
import routerBindings, {
  UnsavedChangesNotifier,
} from "@refinedev/react-router-v6";
import dataProvider from "@refinedev/simple-rest";
import { BrowserRouter, Outlet, Route, Routes } from "react-router-dom";
import { HeadlessInferencer } from "@refinedev/inferencer/headless";
import { Layout } from "components/Layout";
import { PostList } from "pages/list";
import { PostShow } from "pages/show";
import { PostCreate } from "pages/create";
import { PostEdit } from "pages/edit";

const App = () => {
  return (
    <BrowserRouter>
      <Refine
        routerProvider={routerBindings}
        dataProvider={dataProvider("https://api.fake-rest.refine.dev")}
        resources={[
          {
            name: "posts",
            list: "/posts",
            show: "",
            create: "",
            edit: "",
          },
        ]}
        options={{
          syncWithLocation: true,
          warnWhenUnsavedChanges: true,
        }}
      >
        <Routes>
          <Route path="posts"
            element={
              <Layout>
                <Outlet />
              </Layout>
            }
          >
            <Route index element={
              <PostList />
            } />
            <Route
              path="show/:id"
              element={<PostShow />}
            />
            <Route
              path="edit/:id"
              element={<PostEdit />}
            />
            <Route path="create" element={<PostCreate />} />
          </Route>
        </Routes>
        <UnsavedChangesNotifier />
      </Refine>
    </BrowserRouter>
  );
};
export default App;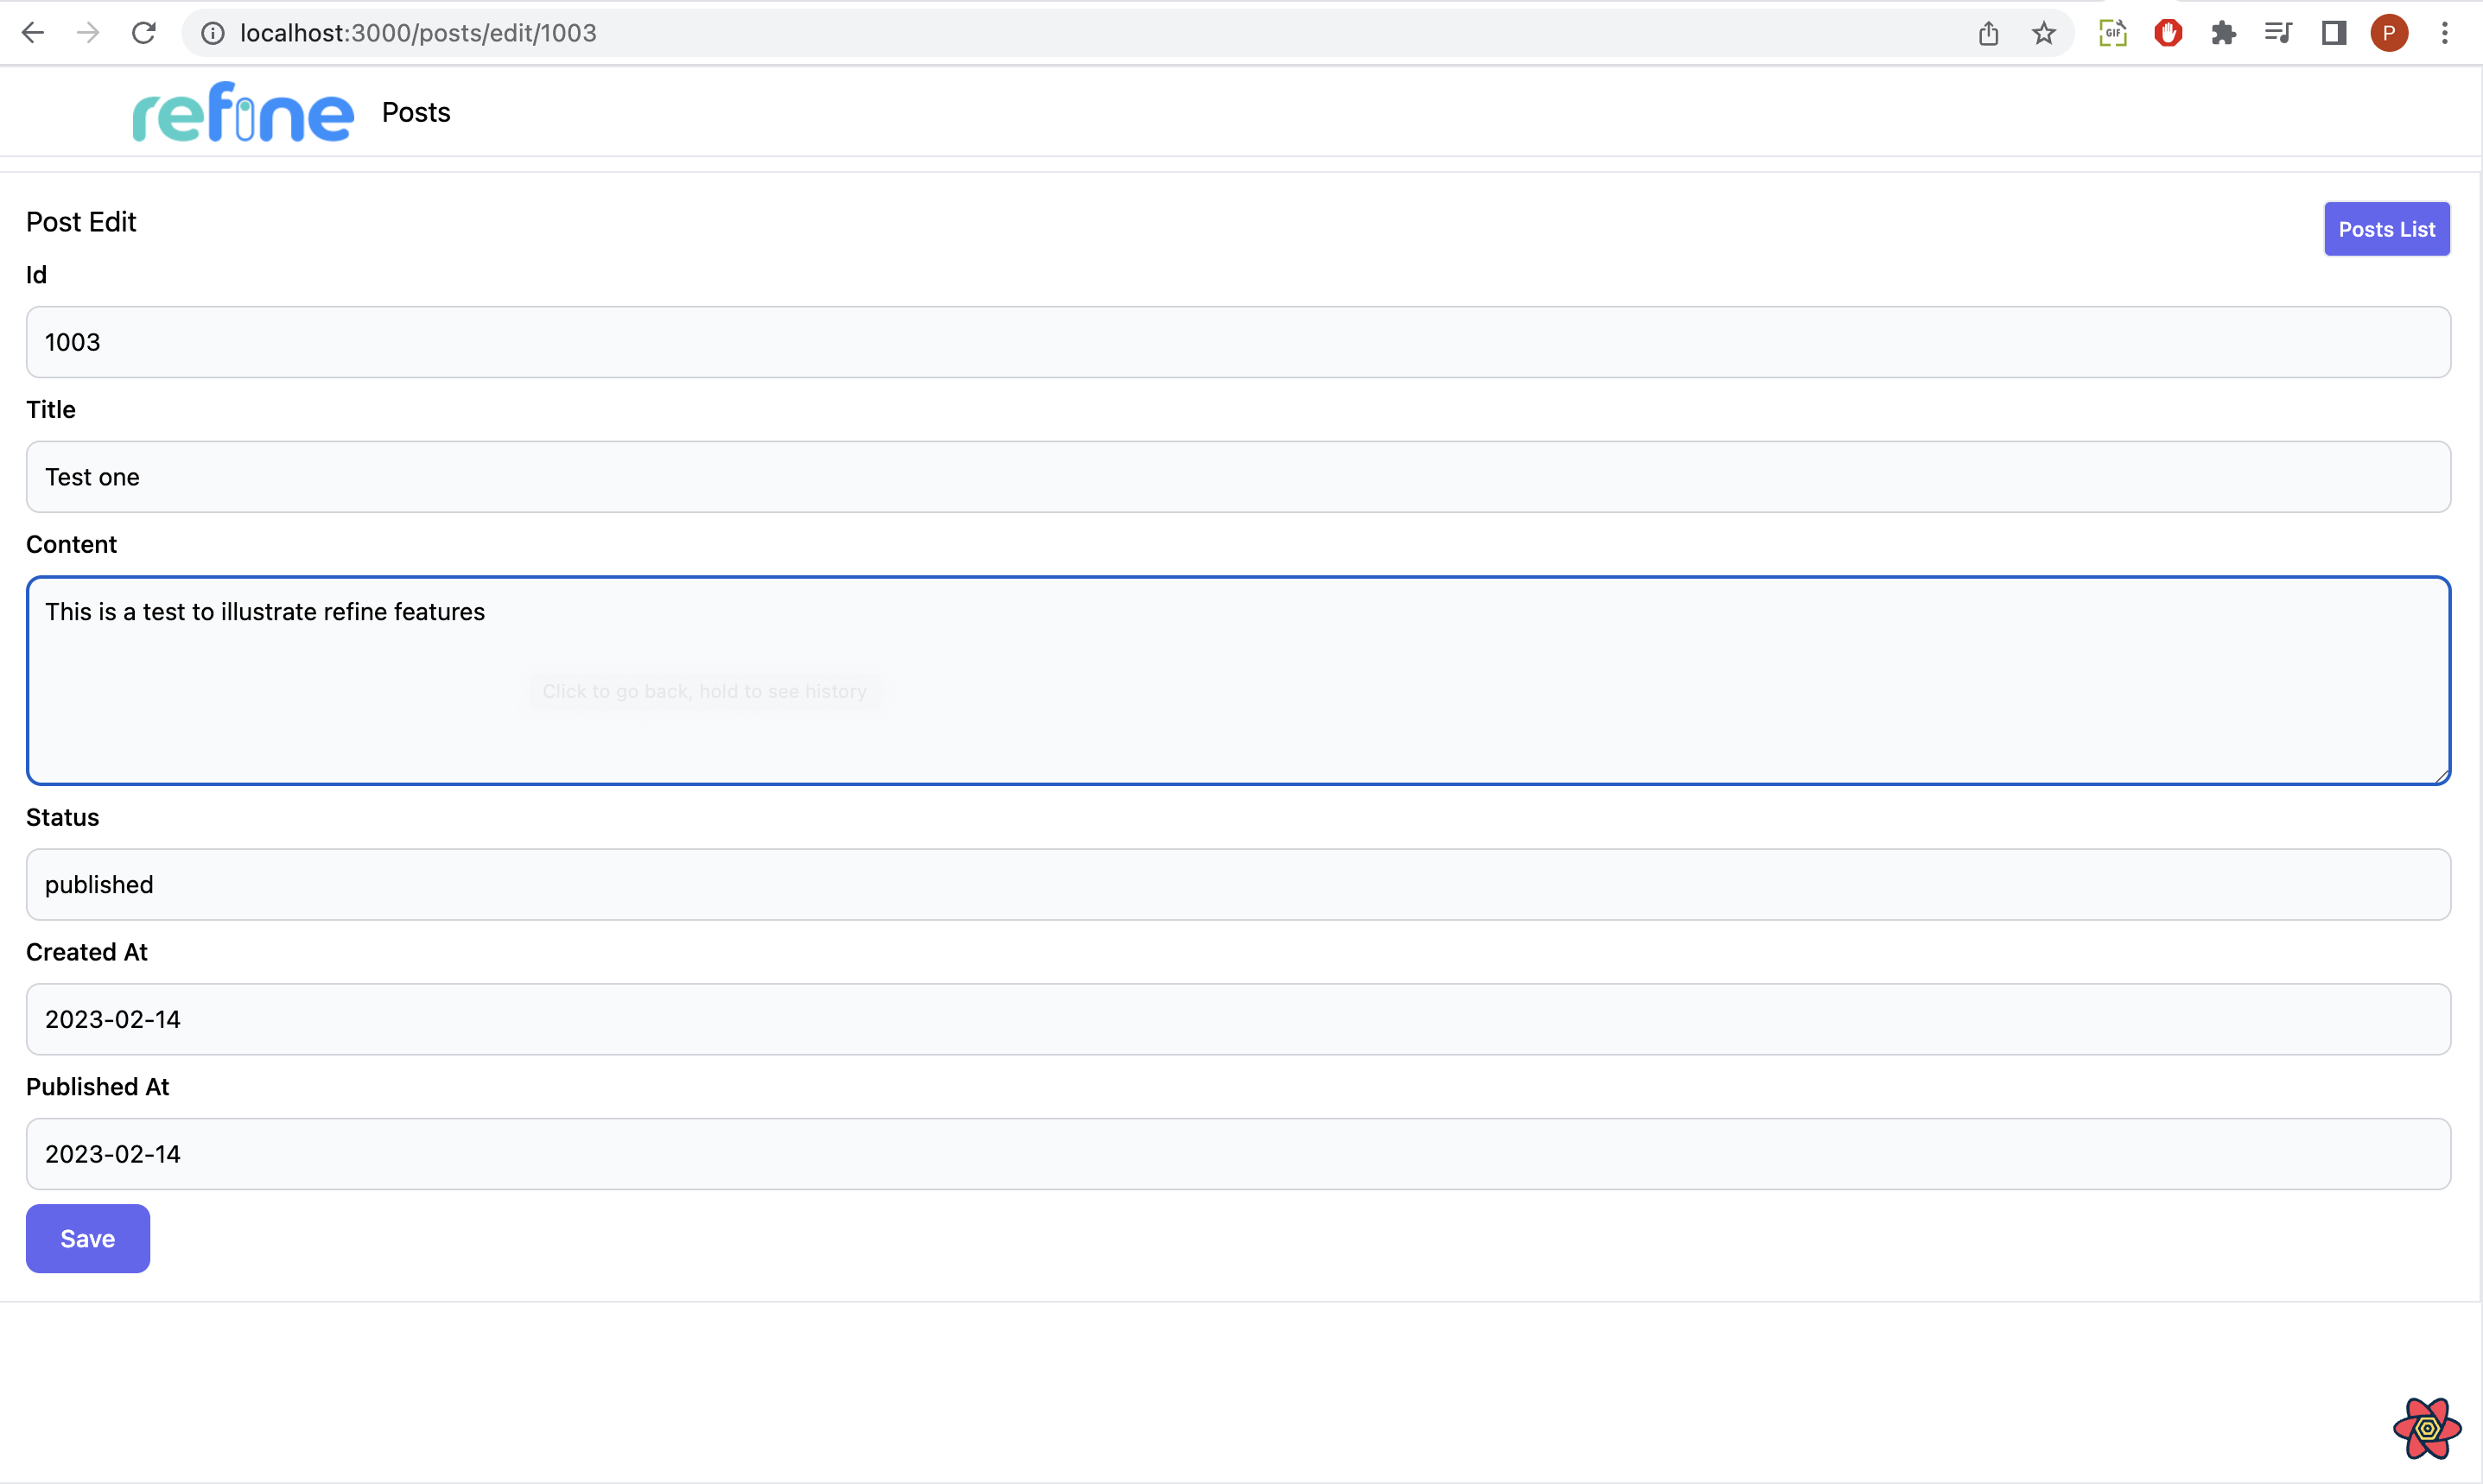

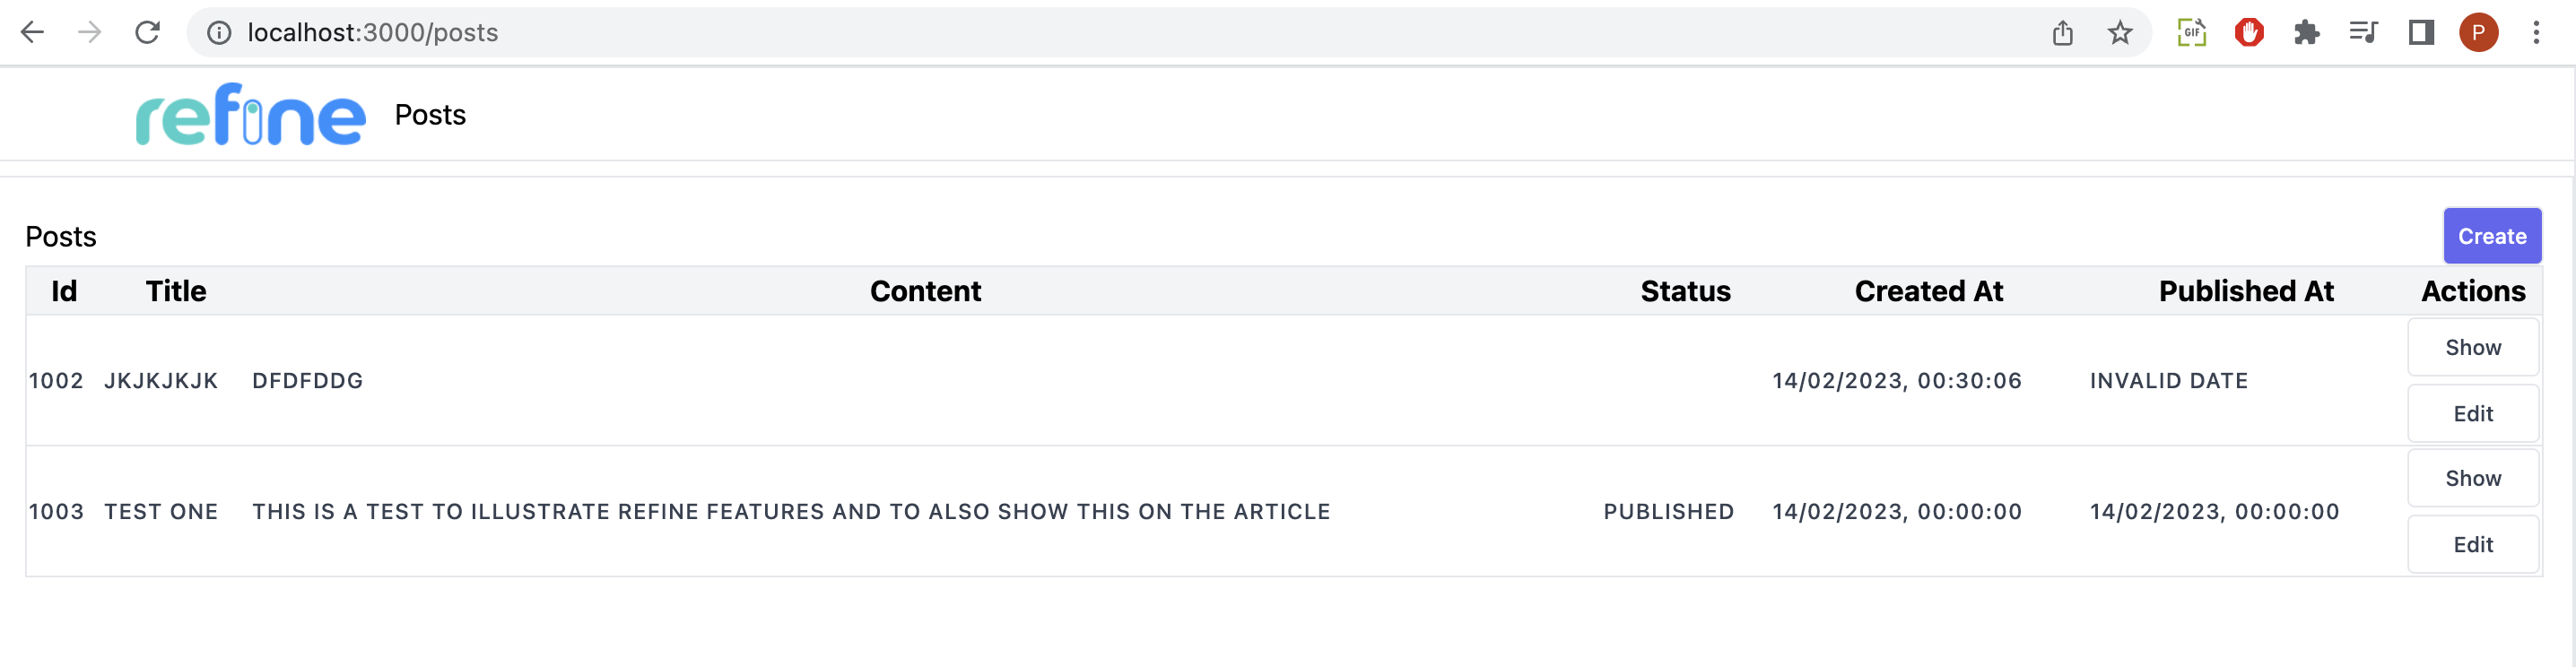
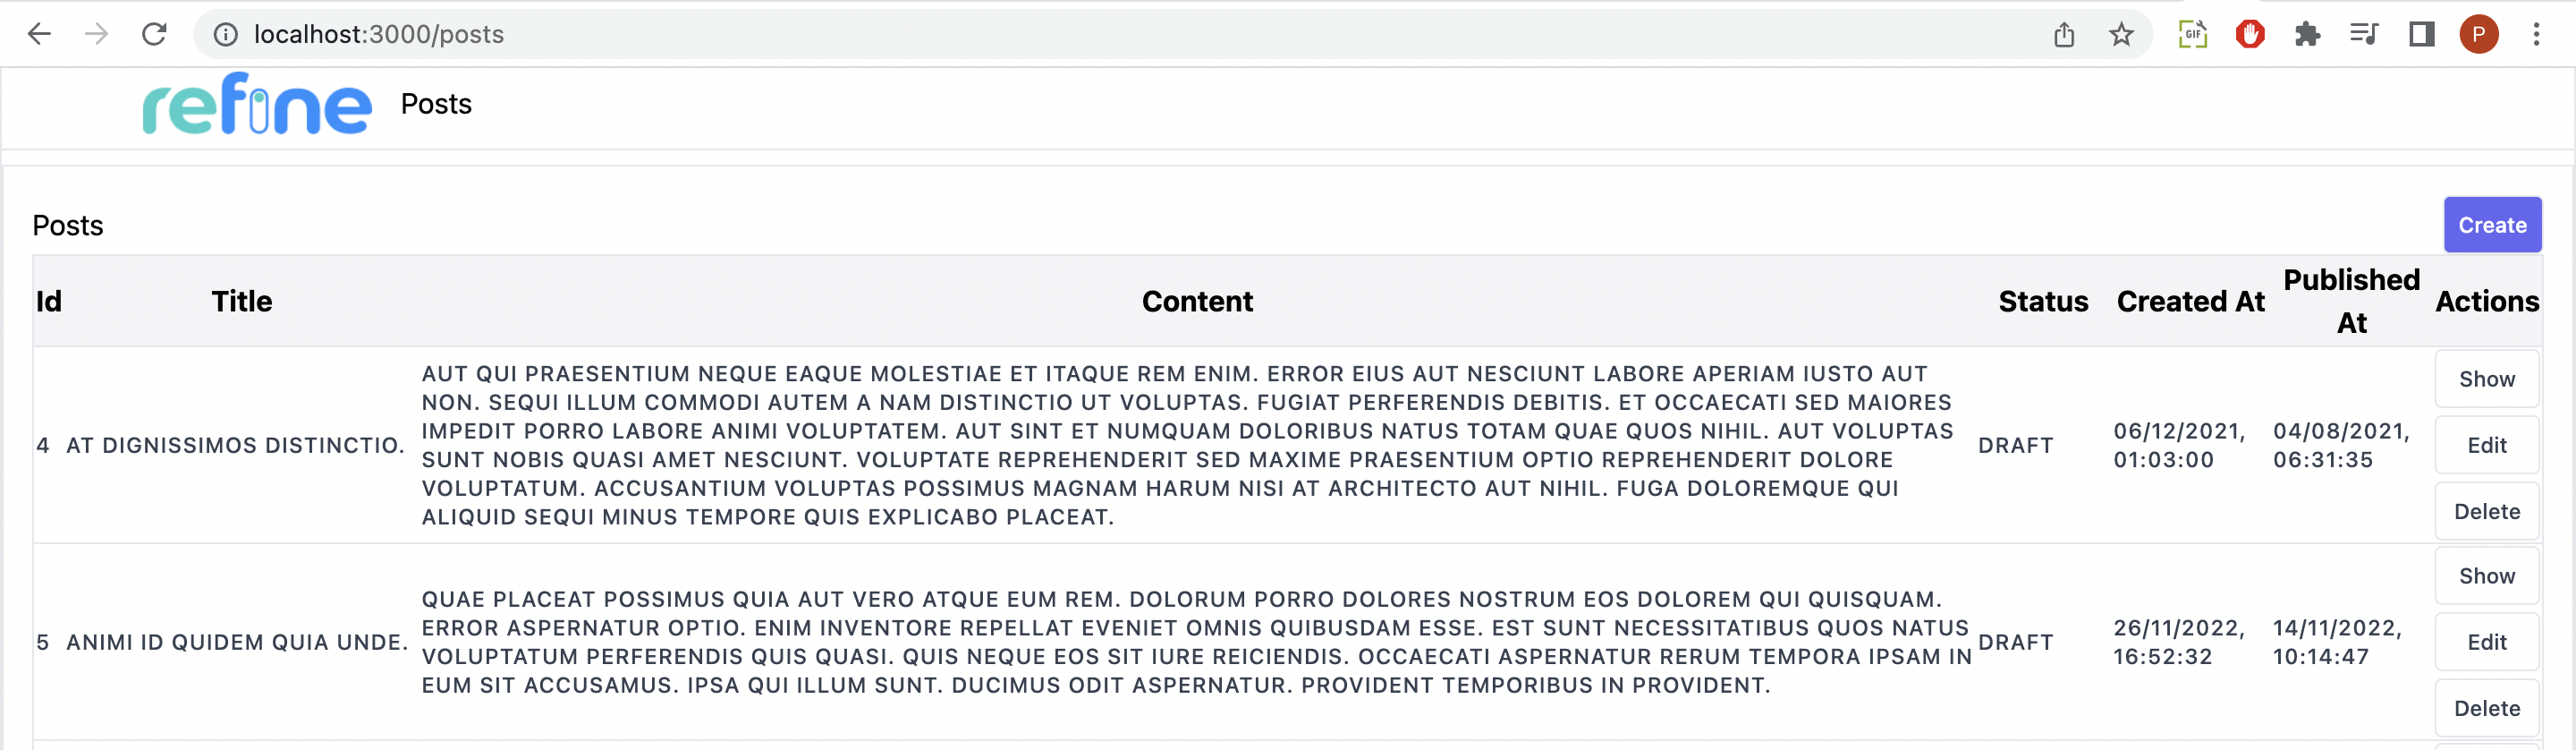
Deleting blog records
The useDelete() hook simply handles the deletion of posts by clicking the delete action buttons on the columns variable, which was mapped into the rows. It provides a mutate() method that handles the deletion.
It is added to the action buttons on the columns variable on the list.tsx file to our resource present in the app.tsx file as shown below:
const columns = React.useMemo<ColumnDef<any>[]>(
  () => [
    ...{
      id: "actions",
      accessorKey: "id",
      header: "Actions",
      cell: function render({ getValue }) {
        return (
          <div className="flex flex-col flex-wrap gap-[4px]">
            ...
            <button
              className="rounded border border-gray-200 p-2 text-xs font-medium leading-tight transition duration-150 ease-in-out hover:bg-red-500 hover:text-white"
              onClick={() =>
                mutate({
                  id: getValue() as number,
                  resource: "posts",
                })
              }
            >
              Delete
            </button>
          </div>
        );
      },
    },
  ],
  []
);
Conclusion
In this article, we covered how to create a Refine application with the Refine CLI method and a CRUD application with Refine. You can do so much with Refine because it lets you quickly create a fully API-powered application with little effort and code. To learn more about the features of Refine, you can visit its documentation here.
Source: OpenReplay


