 Blogs
Blogs
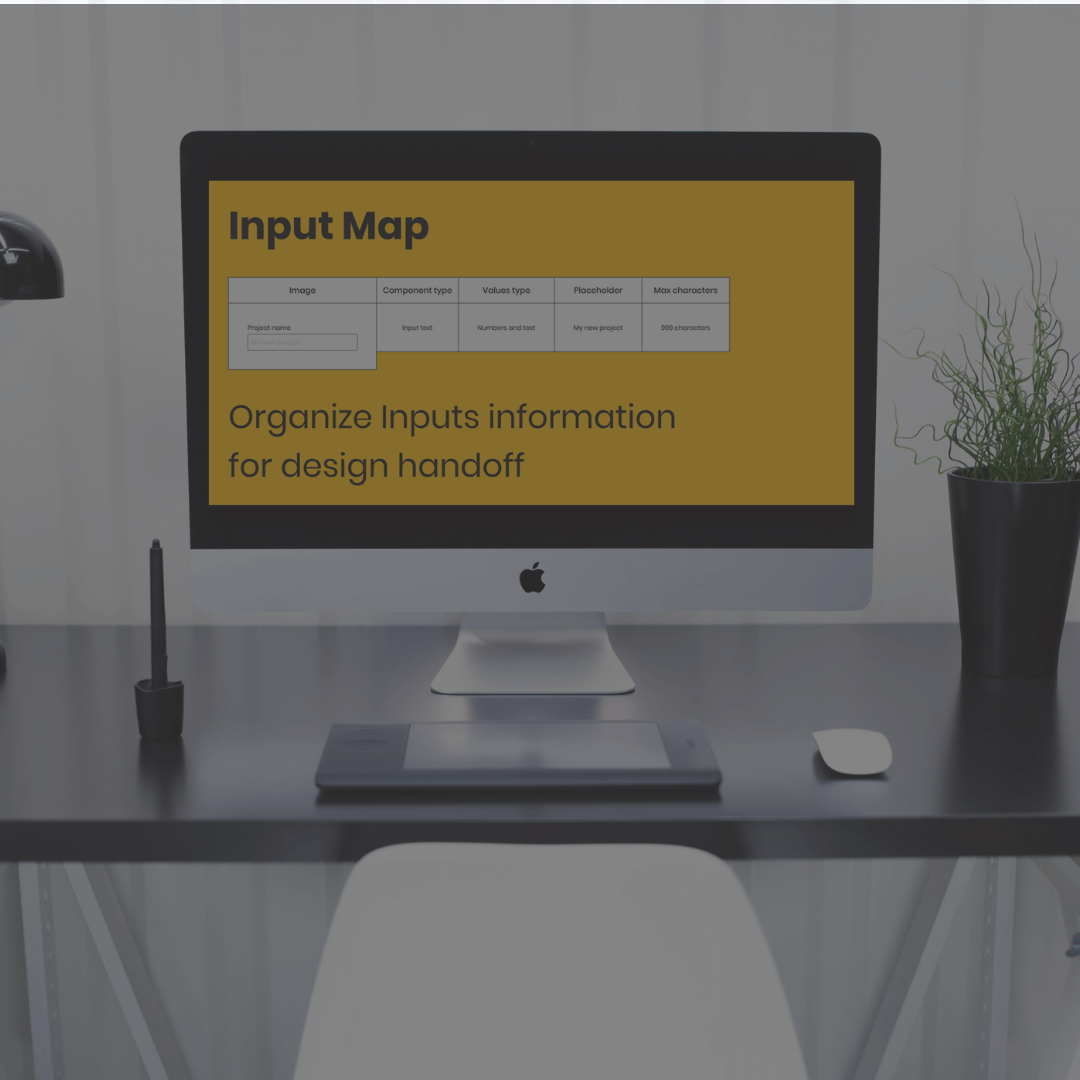
What is an input map and why it is important for product designers to create it
With the input map, you can see the information about each component of the interface. During the design handoff, product designers can use this tool to show developers how each input behaves in the product.
During the last years, I worked on a variety of products for different sectors. Besides learning about different fields, I also learned how to communicate with members of the product team. I believe that communication between the product team members (developers, product managers, QA testers, and designers) is one of the most important aspects that help to produce products that are valuable to the customer. Working with complex products, I developed some techniques and frameworks to communicate relevant information to the developers. The Input map framework is one of them. At the bottom of the article, I added a link to the input map I shared on my Figma page.
What is an input map?
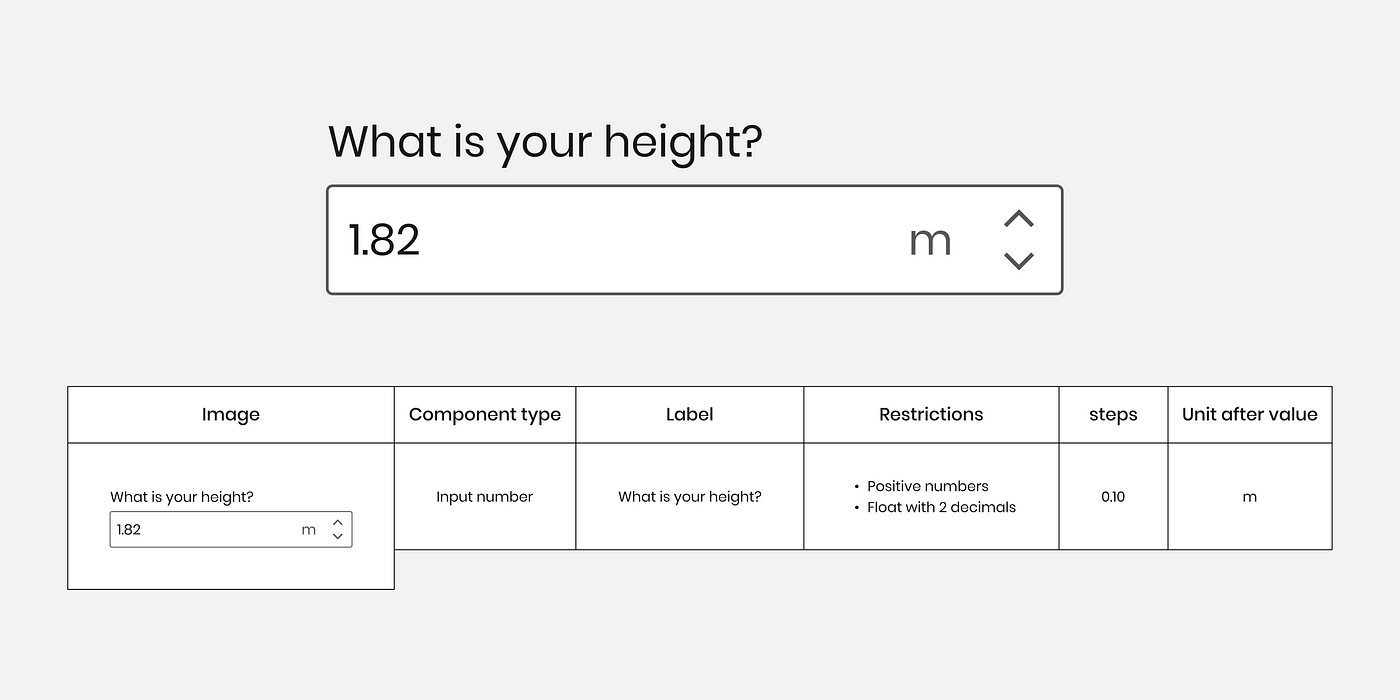
Essentially, an input map is a document in which the designer writes down all the details they need to deliver to the developers about the inputs in the product. For example, if you design a product that encourages people to be more active. In one of the inputs, the app asks the user for their height. The user must enter a number, so we need to prevent the users from entering letters. There is no easy way to describe this data to the developers on the Figma file (you can write it in the description of the elements, but the developers will need to click on it to see it.
Another example would be if you designed an app that helps people to send small amounts of money. Let’s say the app allows users to send up to 500 euros a day. Think about a user typing 700 euros on the number input “how much you want to send”. Now you want to show them a message below that says they can send up to 500 euros. In that case, the Input map helps you explain to the developer what is the maximum number the user can type, and what message the user will see if they type more than this number.
Why is an input map necessary?
Here’s an essential question: why do we need it? Basically, if the information is not communicated in a proper way, it can negatively affect the user experience. I will illustrate this with two examples:
- I would like to use as an example the app I described above, which allows users to transfer small amounts of money. The app allows users to send up to 500 euros. Suppose you did not explain to the developers that, if a user types more than 500 euros, a message should appear. The message should explain that there is a limit of 500 euros per transaction. A user who wants to send 700 euros may be upset because they will not understand why the app does not allow them to type 700.
- Another example would be products that calculate large amounts of data. In this type of product, typing an incorrect value can cause the system to crash. This is because the system is unable to compute a large amount of data since it doesn’t have the capacity to do so. As a result, the user may be upset since they will need to restart the program.
Both cases result in a negative user experience.

How to build an input map?
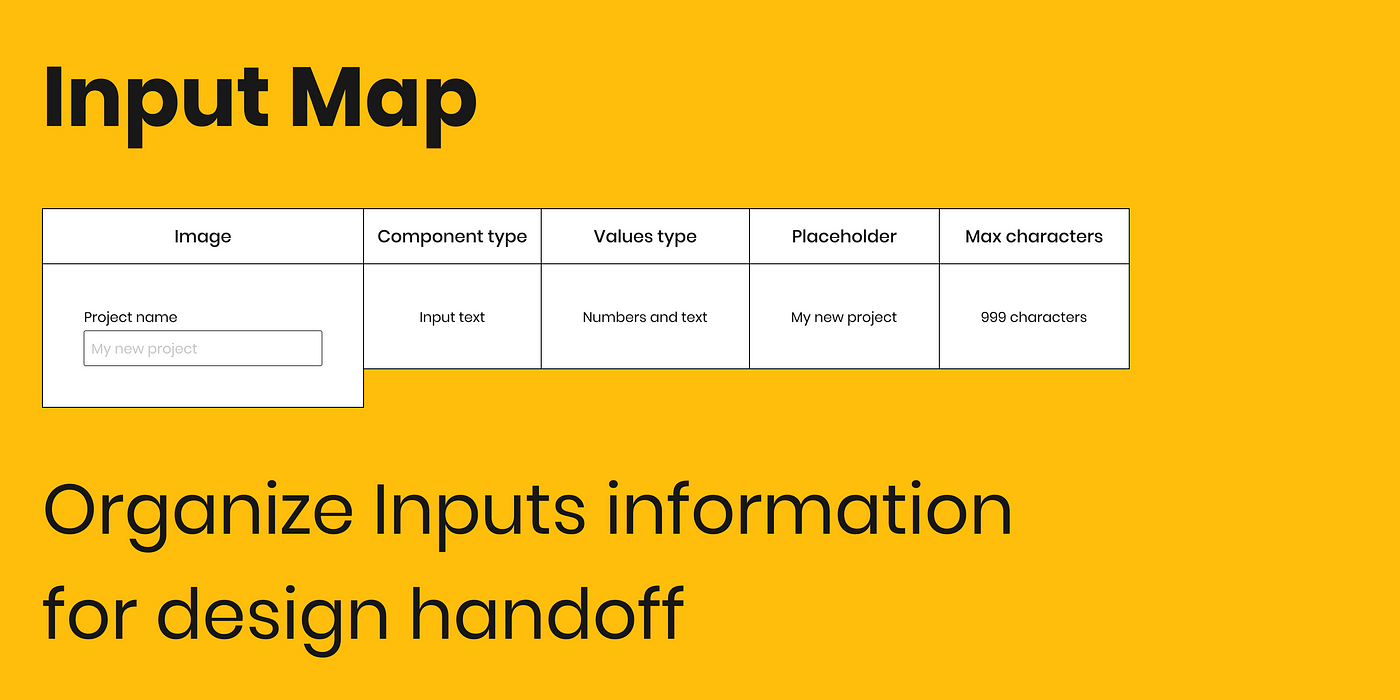
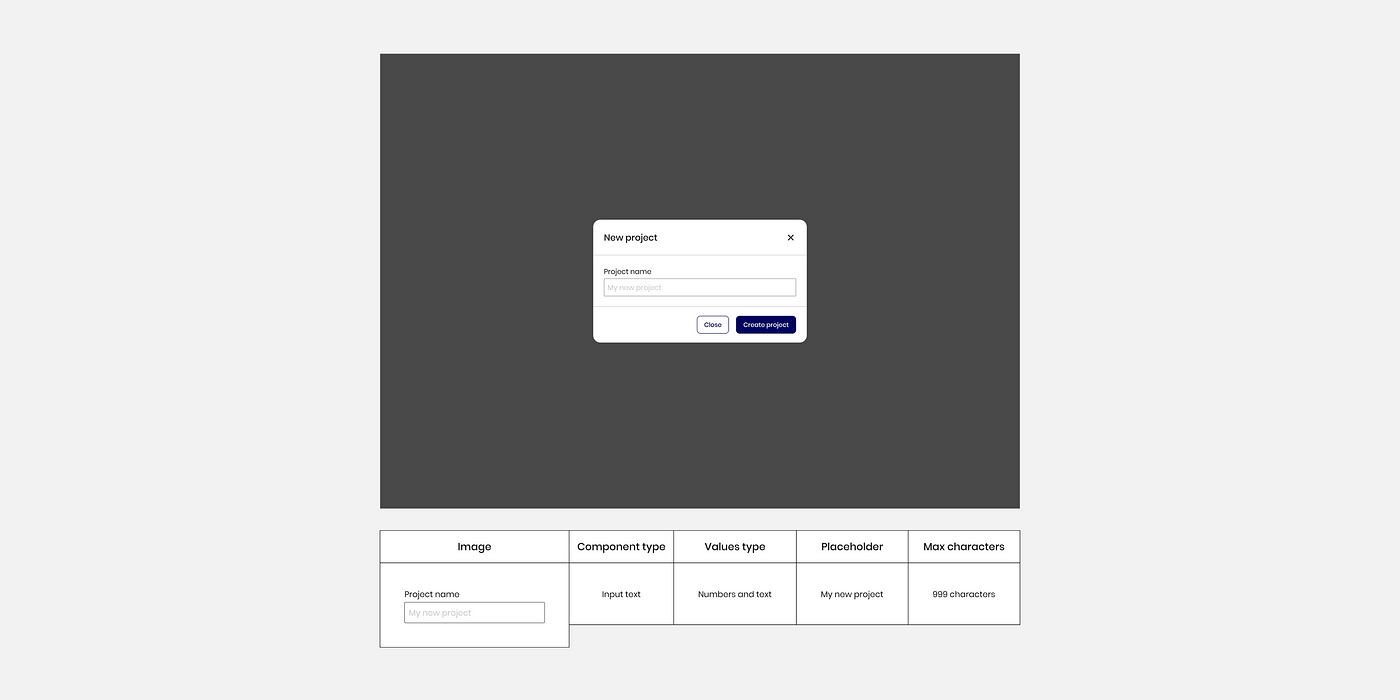
The way I like to build an input map is to create a simple table where I can add all the information I want to deliver to the developers. With this table, I present an image of the component, its label, and placeholder. I also describe all the relevant information such as the maximum or minimum values, default value, whether it is a float or an integer, and how many numbers follow the point.
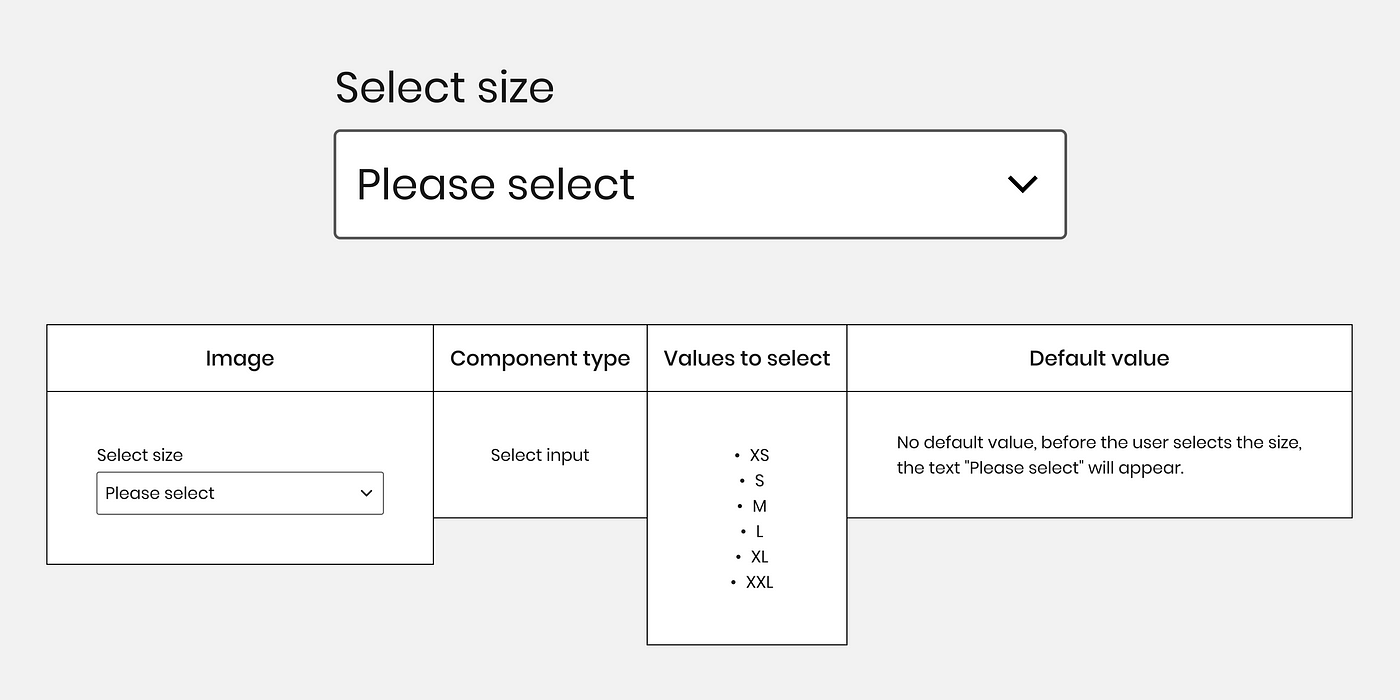
It can be applied to any input, not just text input or number input, but also to select components, search components, sliders, etc. For example, for a select component, you can provide the default selected, the list of values, and how they are arranged within the list.

What information is needed for each component?
Each component has its own characteristics, so we have to adapt the map to each one. In the case of number input, we have some basic information we need to explain, so the developer will be able to add it to the code. This includes minimum and maximum values, negative or positive values, float or integer, and how many digits after the point.
For slider components, we want to explain the min and max values and what are the steps for each movement. You may also want to communicate general information, such as default values and dependencies.
To summarize, the map has to adapt to the exact requirements of each component.
Review and build it together with the developers
The input map should be built in collaboration with the developers since they know the code and have a unique perspective on the information the system needs. For example, a developer can say that the system cannot support such large calculations, so it must limit the user from typing large numbers.
Another advantage of working with developers is that you can get to know their perspectives and understand better the code. This allows you to build the input map faster next time since you will be aware of what they need and the system limitations before you ask them for feedback.
Where do I build the input map?
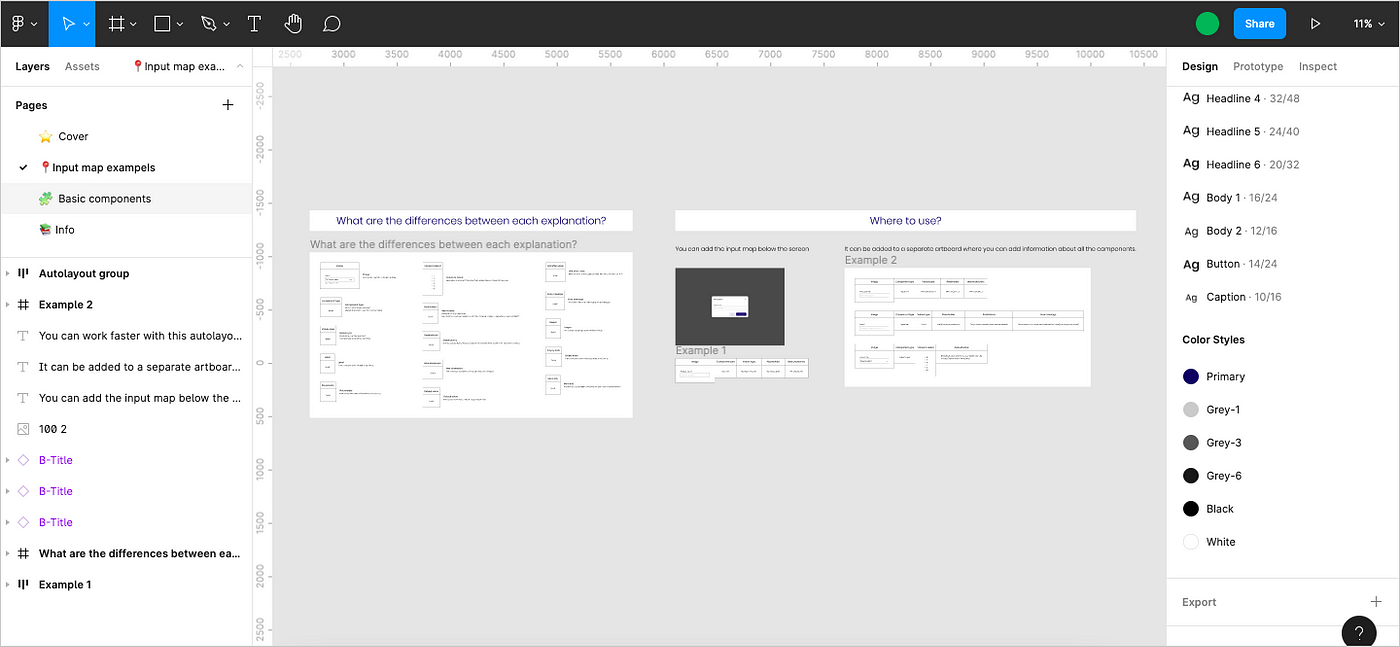
An input map can be created with a design program like Figma, but it can also be created with a whiteboard program like Miro or Mural. With Figma, you can put it below the screens, but with a whiteboard, you can collaborate with the developers much more easily.
Duplicate the template I shared in the Figma community
In order to facilitate the understanding of the input map, I built an input map that can be replicated from the Figma community, so feel free to use it. It will help you to feel and understand how the input map works.
Source: UXPLANET


